This artical mainly provides you with the basic guidance to download, compile and install OpenWrt on VisionFive 2.
To meet the application needs of IoT and smart homes, network infrastructure is becoming more reliable, secure, and intelligent. As an open-source, flexible, and feature rich embedded operating system, OpenWrt plays a crucial role in helping users build a more intelligent network environment in the digital age. Now, OpenWrt can run on StarFive VisionFive 2 RISC-V single board computer, achieving functions such as simultaneous dual band and multiple SSID configurations.

OpenWrt is an open-source embedded operating system based on Linux, with the advantages of high modularity and automation, specifically designed for routers and other network devices. OpenWrt provides an open-source platform that allows you to customize and control various functions of network devices. Due to its flexibility and customizability, OpenWrt is widely used in home and enterprise networks, and applied in industrial control devices, telephones, small robots, smart homes, routers, and VOIP devices. The features of OpenWrt make it an important part of intelligent networks and IoT ecosystems.
Security
OpenWrt is an embedded operating system based on Linux, which inherits the security of the Linux system and comes with a firewall and other security features. OpenWrt has a stable distribution version, and you can promptly fix security vulnerabilities, improve system performance, and ensure system data and network security through daily upgrades and updates.
Customization
OpenWrt system has rich software package resources, and you can extend the functionality by installing various software packages, including installing specific software packages, adjusting network settings, and optimizing performance. You can customize develop it according to your own needs, to achieve more network services and customized functions.
Performance Optimization
OpenWrt focuses on performance optimization of embedded devices and routers, integrating the latest algorithms to ensure stable network connectivity and providing high-performance, low-power solutions.
Community Support
OpenWrt system has strong community support, providing rich documentation, tutorials, and more other resources. You can obtain resources and technical support in the community, and you can also share customized solutions to continuously optimize the OpenWrt system.
OpenWrt can now run on StarFive VisionFive 2 RISC-V single board computer, achieving functions such as simultaneous dual band and multiple SSID configurations. To ensure you can fully utilize the performance of JH-7110, you need to prepare the relevant hardware before executing the demonstration program:

VisionFive 2 is the world’s first high-performance mass-produced RISC-V single board computer with an integrated 3D GPU. It is equipped with a JH-7110 RISC-V multimedia processor and boasted a quad-core 64-bit RISC-V SoC, running up to 1.5 GHz. VisionFive 2 has strong performance, rich interfaces, strong scalability, and abundant software resources, making it an excellent choice for open-source enthusiasts to explore the RISC-V world.
Performance
VisionFive 2 boasts a quad-core 64-bit JH-7110 SoC with RV64GC ISA, running up to 1.5 GHz, and integrated with IMG BXE-4-32 MC1, supporting OpenCL 3.0, OpenGL ES 3.2, and Vulkan 1.2.
Interface
VisionFive 2 provides rich I/O peripherals such as M.2 connector, eMMC socket, USB 3.0 ports, a 40-pin GPIO header, gigabit Ethernet ports, a TF card slot, and many more.
Image & Video Processing
VisionFive 2 has onboard audio and video processing capabilities and has MIPI-CSI and MIPI-DSI connectors as multimedia peripherals. It integrated StarFive ISP and is compatible with mainstream camera sensors; VisionFive 2 has a built-in image/video processing subsystem, supporting H.264/H.265/JPEG encoding and decoding.
SBC Link:Buy VisionFive 2 | RVspace
Installation
1. Download the code:
git clone https://github.com/starfive-tech/openwrt.git
Note: It is recommended to compile in Ubuntu system release 20 or above.
2. Execute the following command to enter wigyori directory:
cd openwrt/
3. Execute the following command to checkout the image:
git checkout jh71x0-openwrt
Configuration
1. Execute the following command to enter the menu configuration GUI:
make menuconfig
In the menu configuration GUI, follow the steps to select the corresponding option:
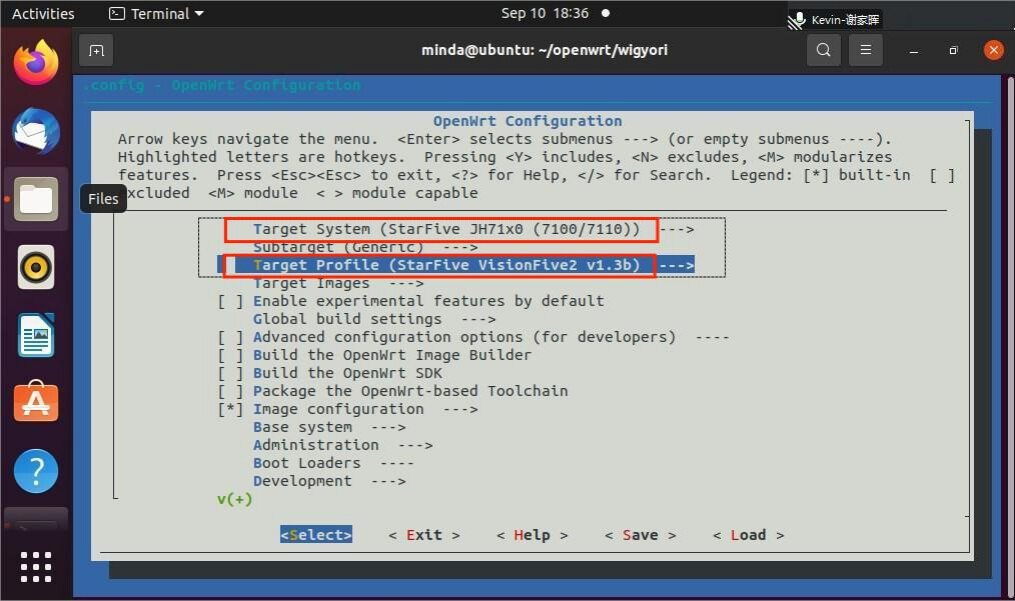
a. In OpenWrt Configuration, select Target System and Target Profile:
→ Target System (StarFive JH71x0 (7100/7110))
→ Target Profile (StarFive VisionFive 2 v1.2a) or Target Profile (StarFive VisionFive 2 v1.3b)
Note: VisionFive 2 currently has 2 versions, v1.2a and v1.3b.
b. In OpenWrt Configuration, select Root filesystem archives under Target Image:

2. Luci configuration:
a. Execute the following command to install luci:
./scripts/feeds update packages luci
./scripts/feeds install -a -p luci
b. Execute the following command to enter the menu configuration GUI to configure luci:
make menuconfig
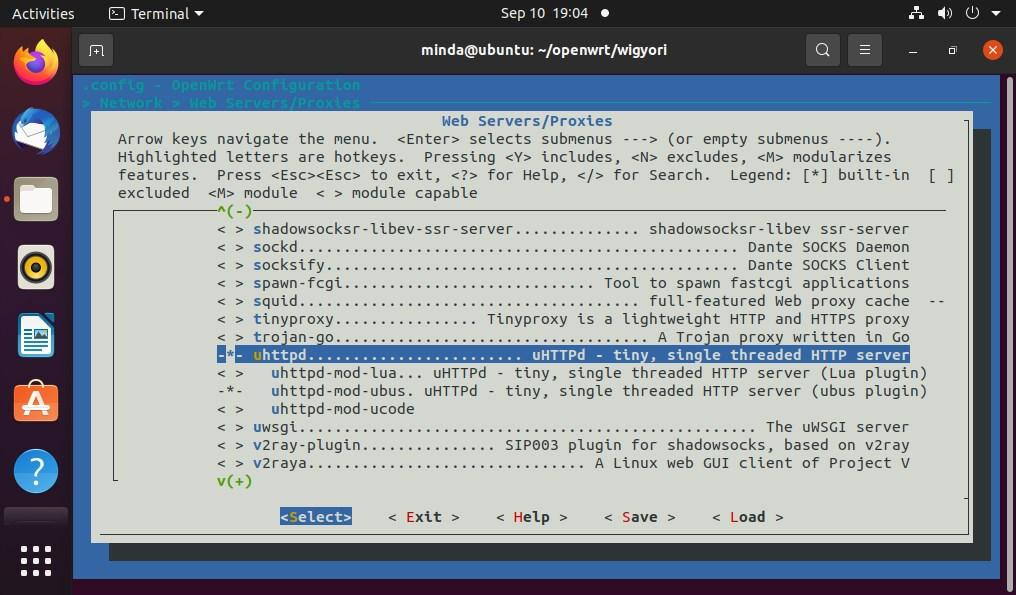
c. Select uhttpd in the configuration menu bar in the following order:
→ Network → Web Servers/Proxies → <*> uhttpd
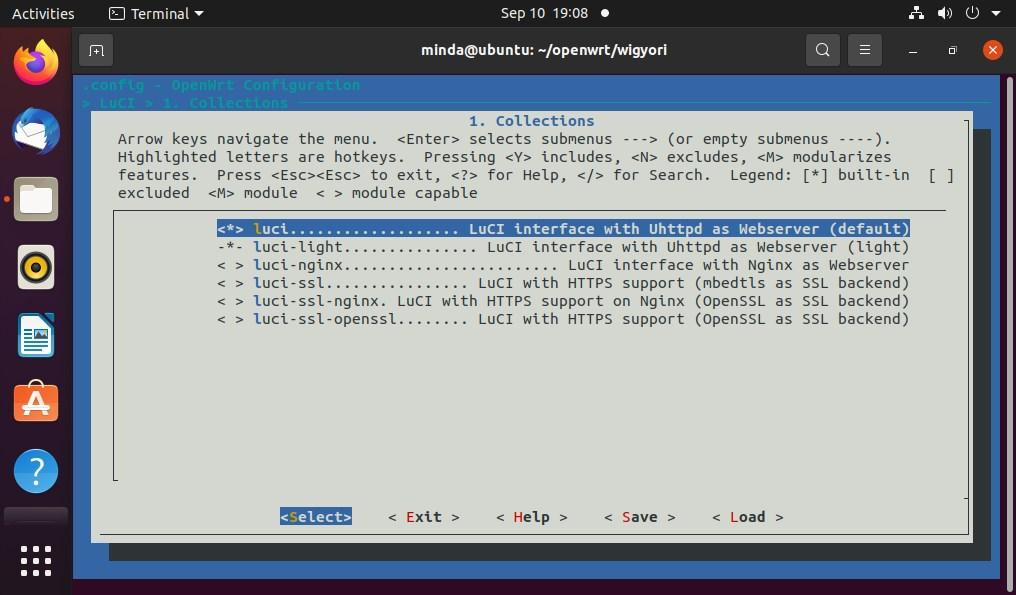
d. Select luci in the configuration menu bar in the following order:
→ LuCI → 1. Collections → <*> luci
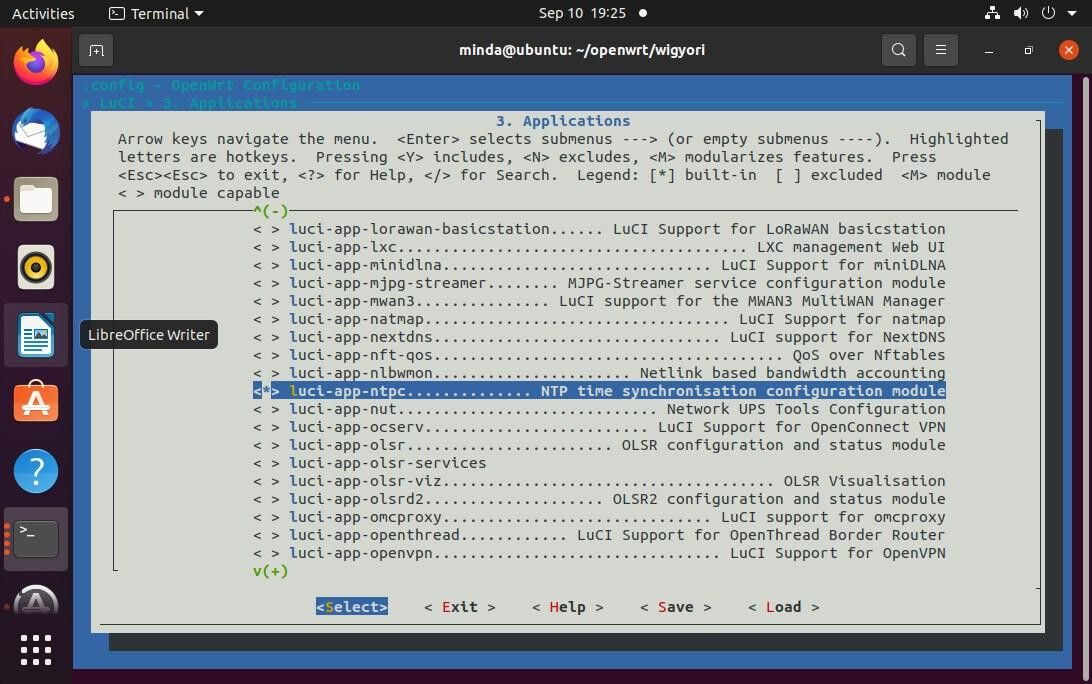
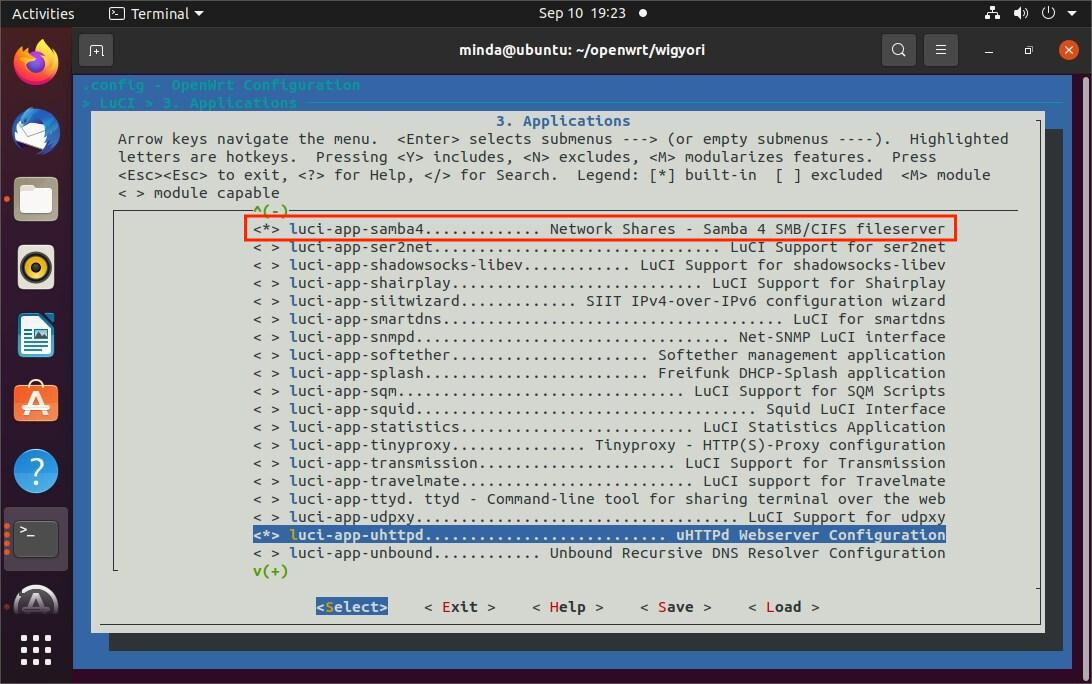
→ LuCI → 3. Applications → <> luci-app-ddns
<> luci-app-firewall
<> luci-app-ntpc
<> luci-app-samba4
<*> luci-app-uhttpd

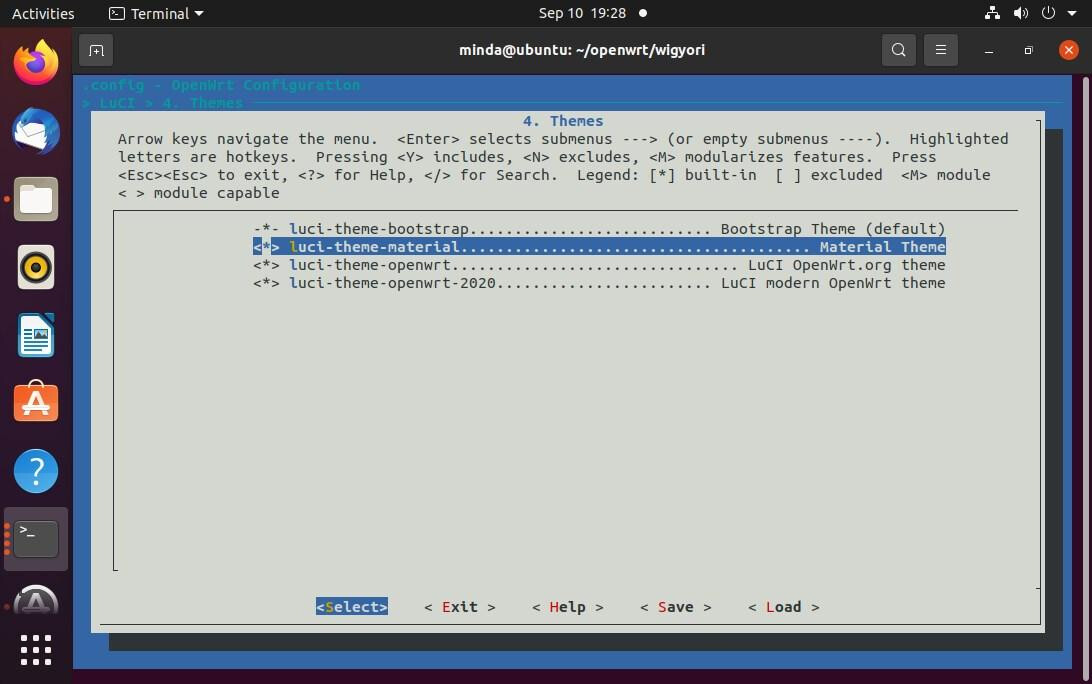
→ LuCI → 4. Themes → Select all
3. Wireless Configuration
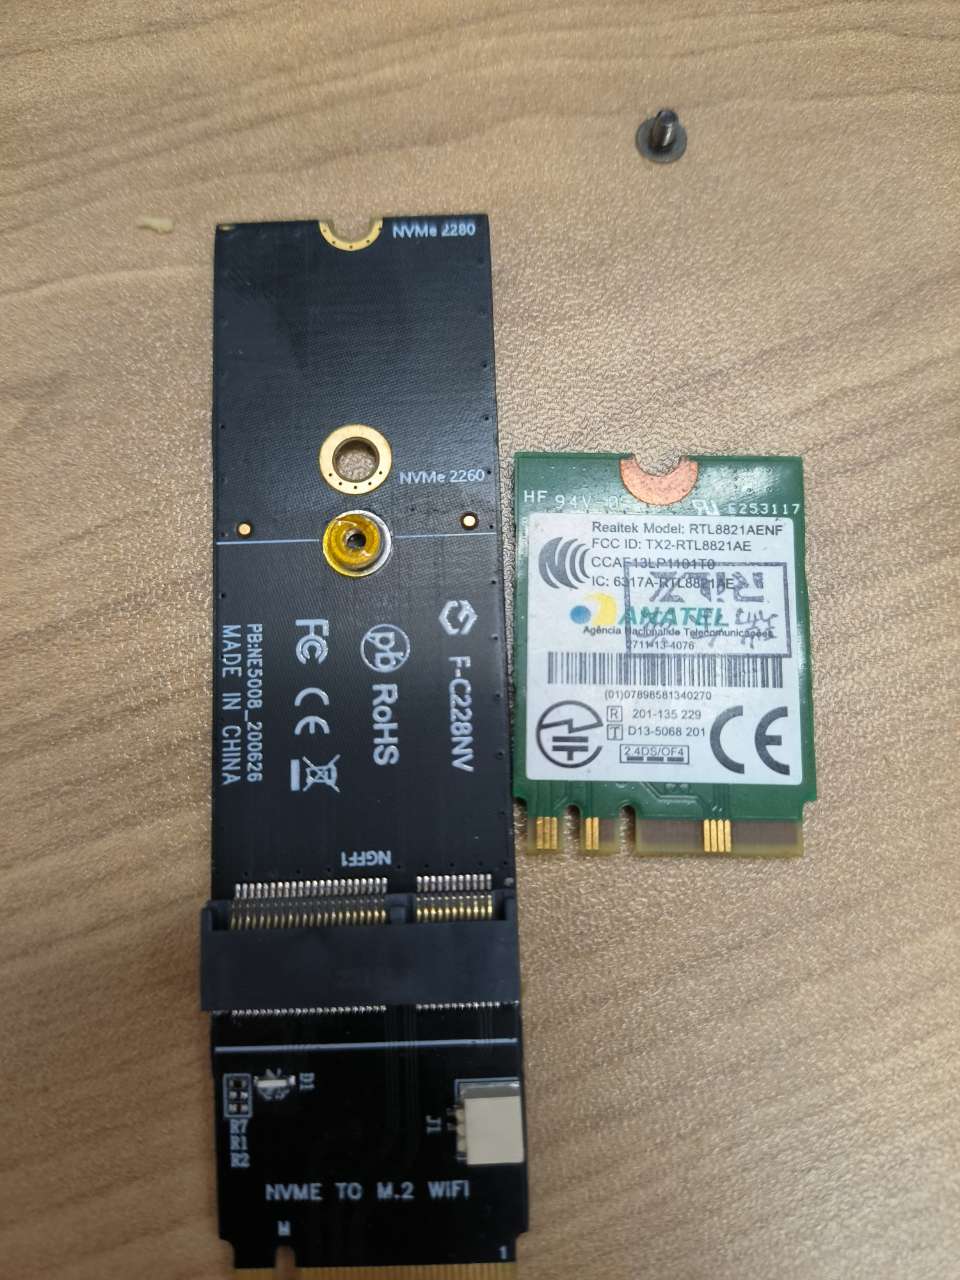
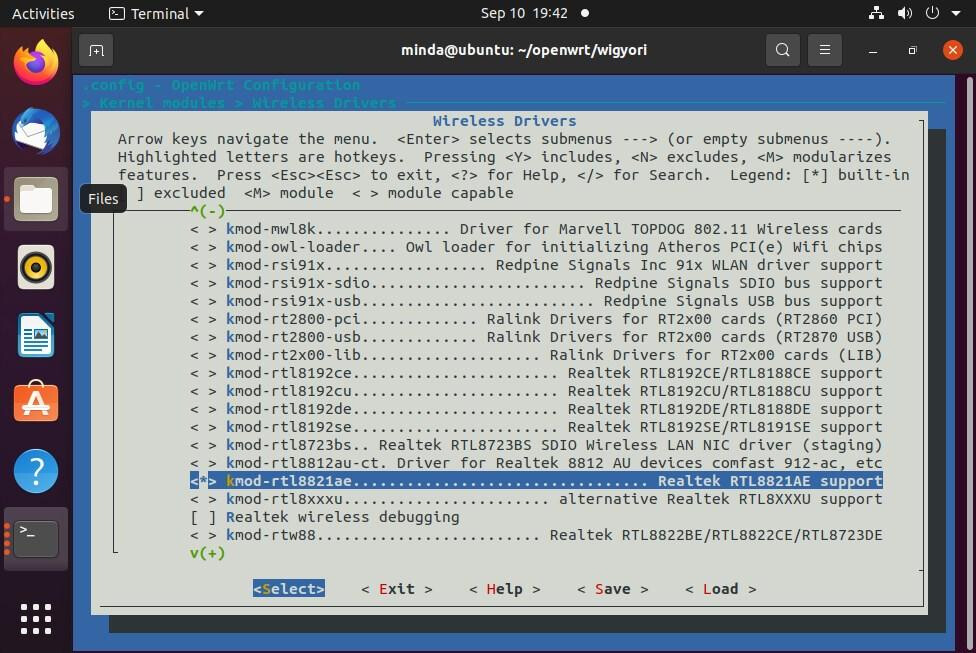
Due to the lack of WiFi modules on VisionFive 2, you need to purchase a WiFi Dongle. OpenWrt supports dozens of WiFi drivers, and the RTL8821AE PCI interface driver, which is easier to purchase, is chosen here. On VisionFive 2, there is an M.2 M-key interface, which needs to be connected to the NVME M.2 M-key to a/e key interface board to connect to the RTL8821AE module.
In the menu configuration GUI, follow the steps to configure wireless connection:
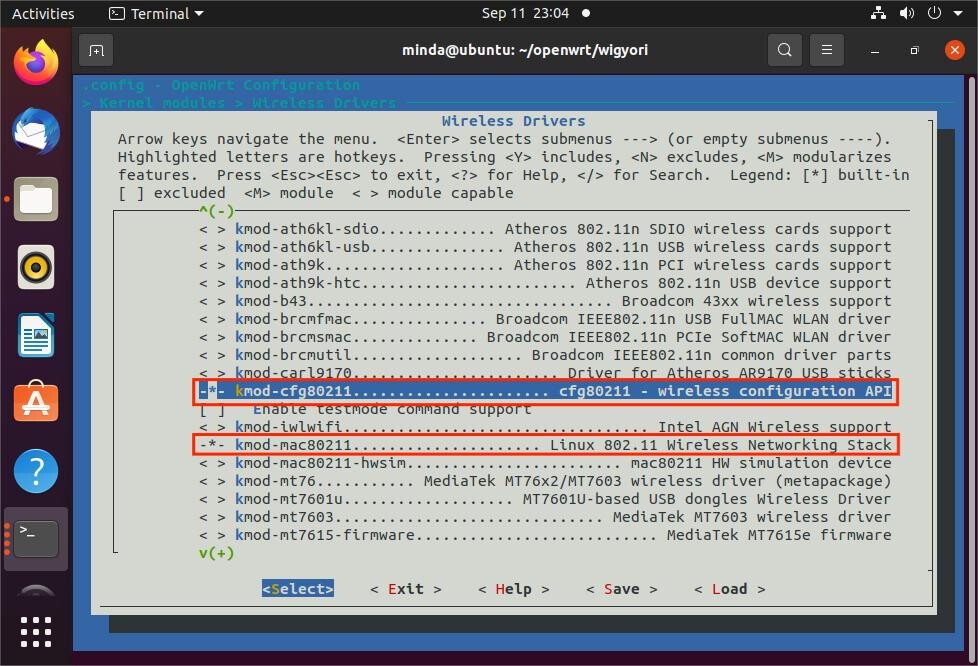
a. → Kernel modules → Wireless Driver → <> kmod-cfg80211
<> kmod-mac80211
<*> kmod-rtl8821ae
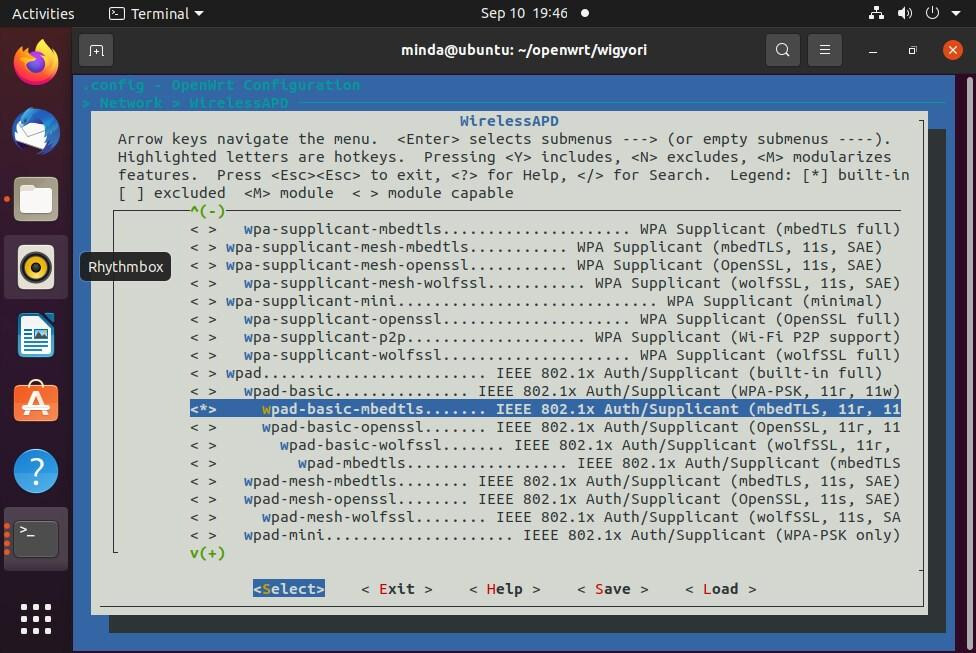
b. → Network → WirelessAPD → <> wpad-basic-mbedtls
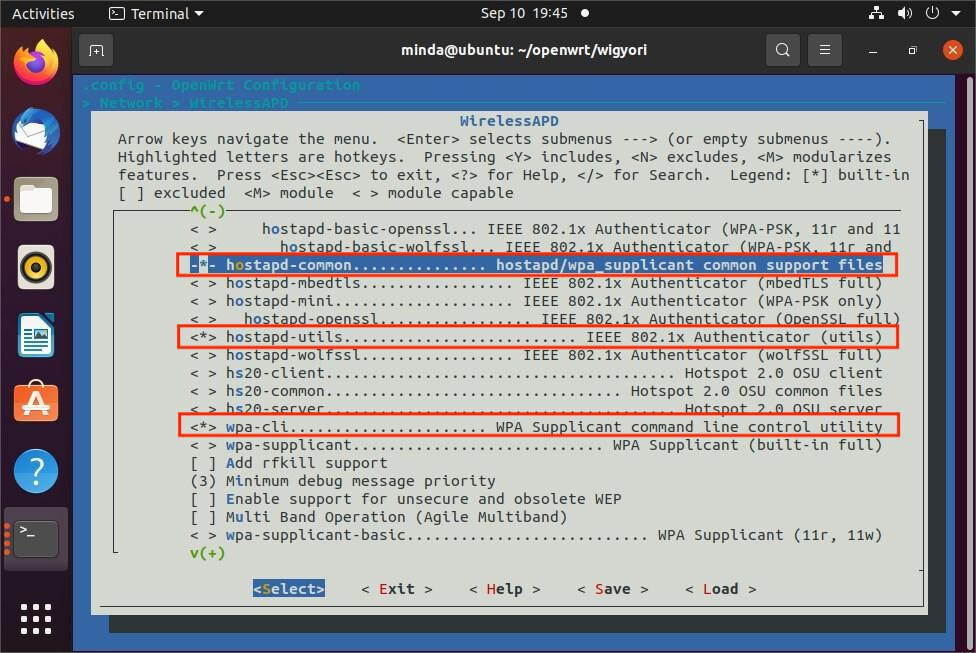
<> hostapd-common
<> wpa-cli
<> hostapd-utils
4. Execute the following command to download the dependency packages:
./scripts/feeds update -a
./scripts/feeds install -a
make download V=s
Note: The download process may take a long time, please be patient. If a “download fail” error occurs during the process, it indicates that the software package has not been fully downloaded. Please execute the above command again until no “download fail” occurs.
5. Execute the following command to compile:
make -j8
Note: The compilation may take 2 hours.
6. Execute the following command to generate an SD card image:
bin/targets/jh71x0/generic
openwrt-jh71x0-generic-visionfive2-v1.3b-ext4-sdcard.img.gz
7. Unzip the SD card image:
gunzip openwrt-jh71x0-generic-visionfive2-v1.3b-ext4-sdcard.img.gz
8. Flash the image into the SD card:
dd if=openwrt-jh71x0-generic-visionfive2-v1.3b-ext4-sdcard.img of=/dev/sdX bs=1M
oflag=direct
Note:
-
For Windows, you can use balenaEtcher to flash the image.
-
Since the image does not include SPL and U-Boot, Nor Flash needs to have SPL and U-Boot flashed and should boot with QSPI Nor Flash.
-
Use the sudo fdisk –l command to find your device so that you can replace X value. For exmple, if your device is /dev/sdb, X should be b.
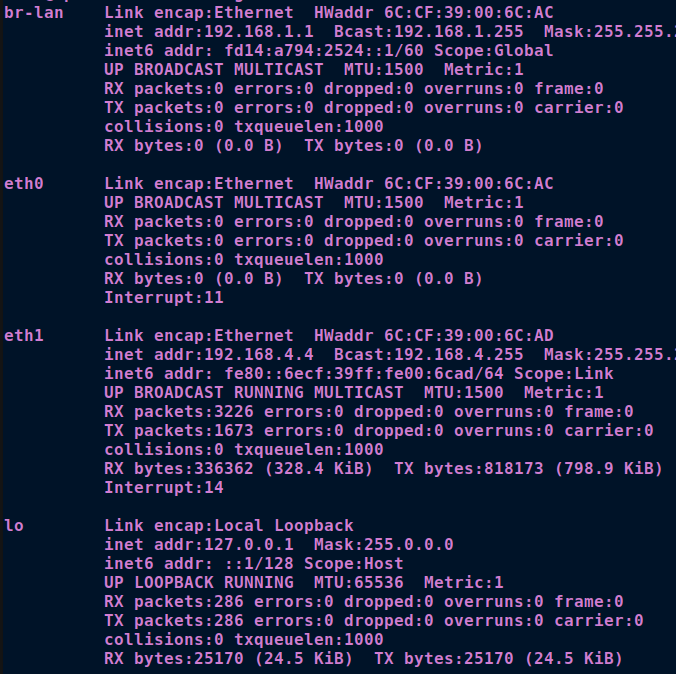
9. Open OpenWrt.
10. Add passwall function.
Follow the steps below to add the passwall function. The passwall function is not included in the default function and requires code modification and package download support.
a. Execute the following command under wigori directory:
echo "src-git passwall_packages
https://github.com/xiaorouji/openwrt-passwall-packages.git;main" >> "feeds.conf.default"
echo "src-git passwall https://github.com/xiaorouji/openwrt-passwall.git;main" >>
"feeds.conf.default"
b. Modify include/target.mk:
diff --git a/include/target.mk b/include/target.mk
index b5e3e7ff6f..f65e127ecf 100644
--- a/include/target.mk
+++ b/include/target.mk
@@ -53,7 +53,7 @@ DEFAULT_PACKAGES.nas:=\
              mdadm
# For router targets
DEFAULT_PACKAGES.router:=\
-            dnsmasq \
+           dnsmasq-full \
c. Download and install the package of passwall:
./scripts/feeds update -a
./scripts/feeds install -a
./scripts/feeds install -a -f -p PWpackages
./scripts/feeds install luci-app-passwall
d. Configure passwall and unconfigure dnsmasq:
make menuconfig
Configure passwall:
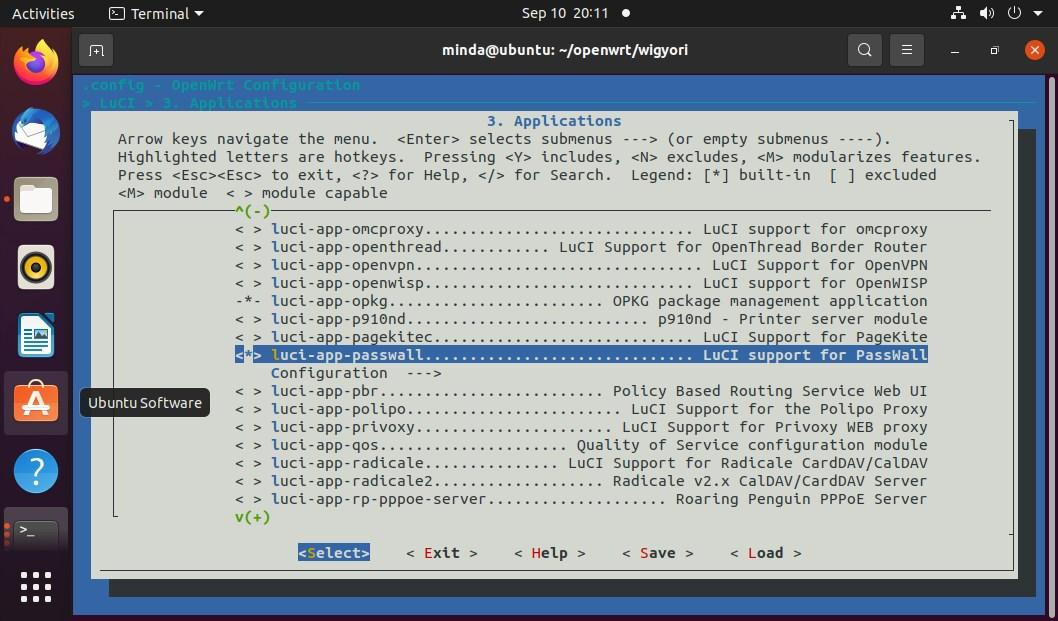
→ OpenWrt Configuration → LuCI → 3. Applications → <*> luci-app-passwall
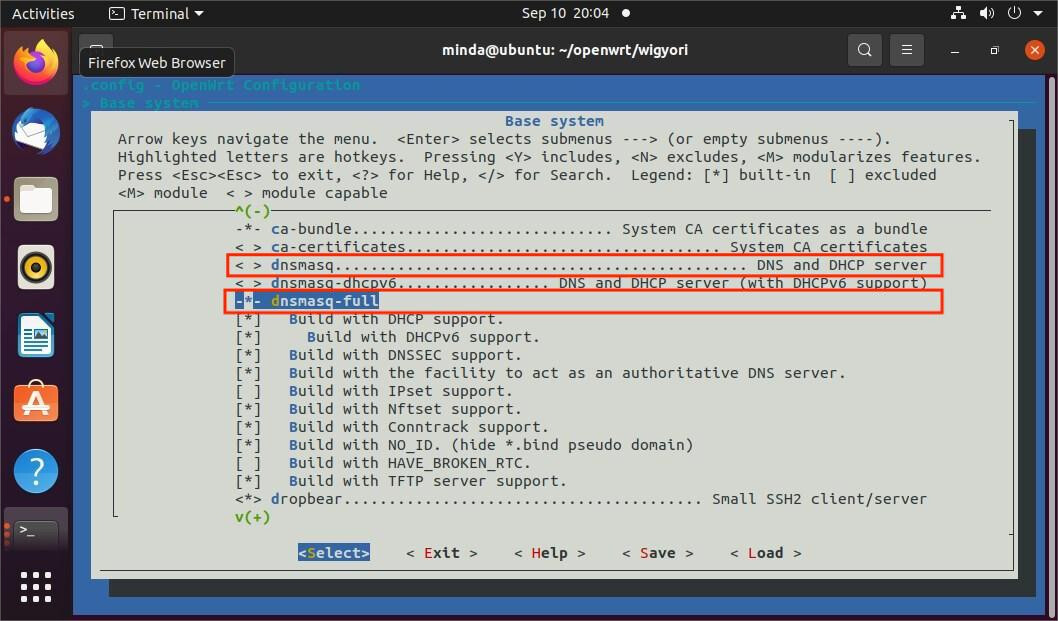
Unconfigure dnsmasq:
→ OpenWrt Configuration → Base system → < >dnsmasq
→ OpenWrt Configuration → Base system → -*- dnsmasq-full
e. Execute the following command to update and download software package:
make download V=s
f. Compilation:
The same as step 5。