I love that your NVMe gives the temperature in Kelvin, that is brilliant!
2 Likes
Can you provide a link, please?
https://www.seeedstudio.com/re-computer-case-p-4465.html while i have a couple of ‘case extenders’, for this board it wasn’t required.
For spacers on the opposing ends that didnt line up to existing mounting holes i just pulled out some brass standoffs i had that were close but a tad short ( on purpose ) then put screws on them so i could adjust the height. But most anything would work really.
Thank You, Much Appreciated.
I individually bought all of the “starter kit” items linked here, sans the Vision Five 2 board.
Acrylic Case (comes with fan):
Power Supply:
eMMC:
eMMC to uSD (micro SD) adapter board:
They also sell a USB 3.1 to eMMC reader/writer (I would have bought this had I known it was available):
Apropos to nothing…
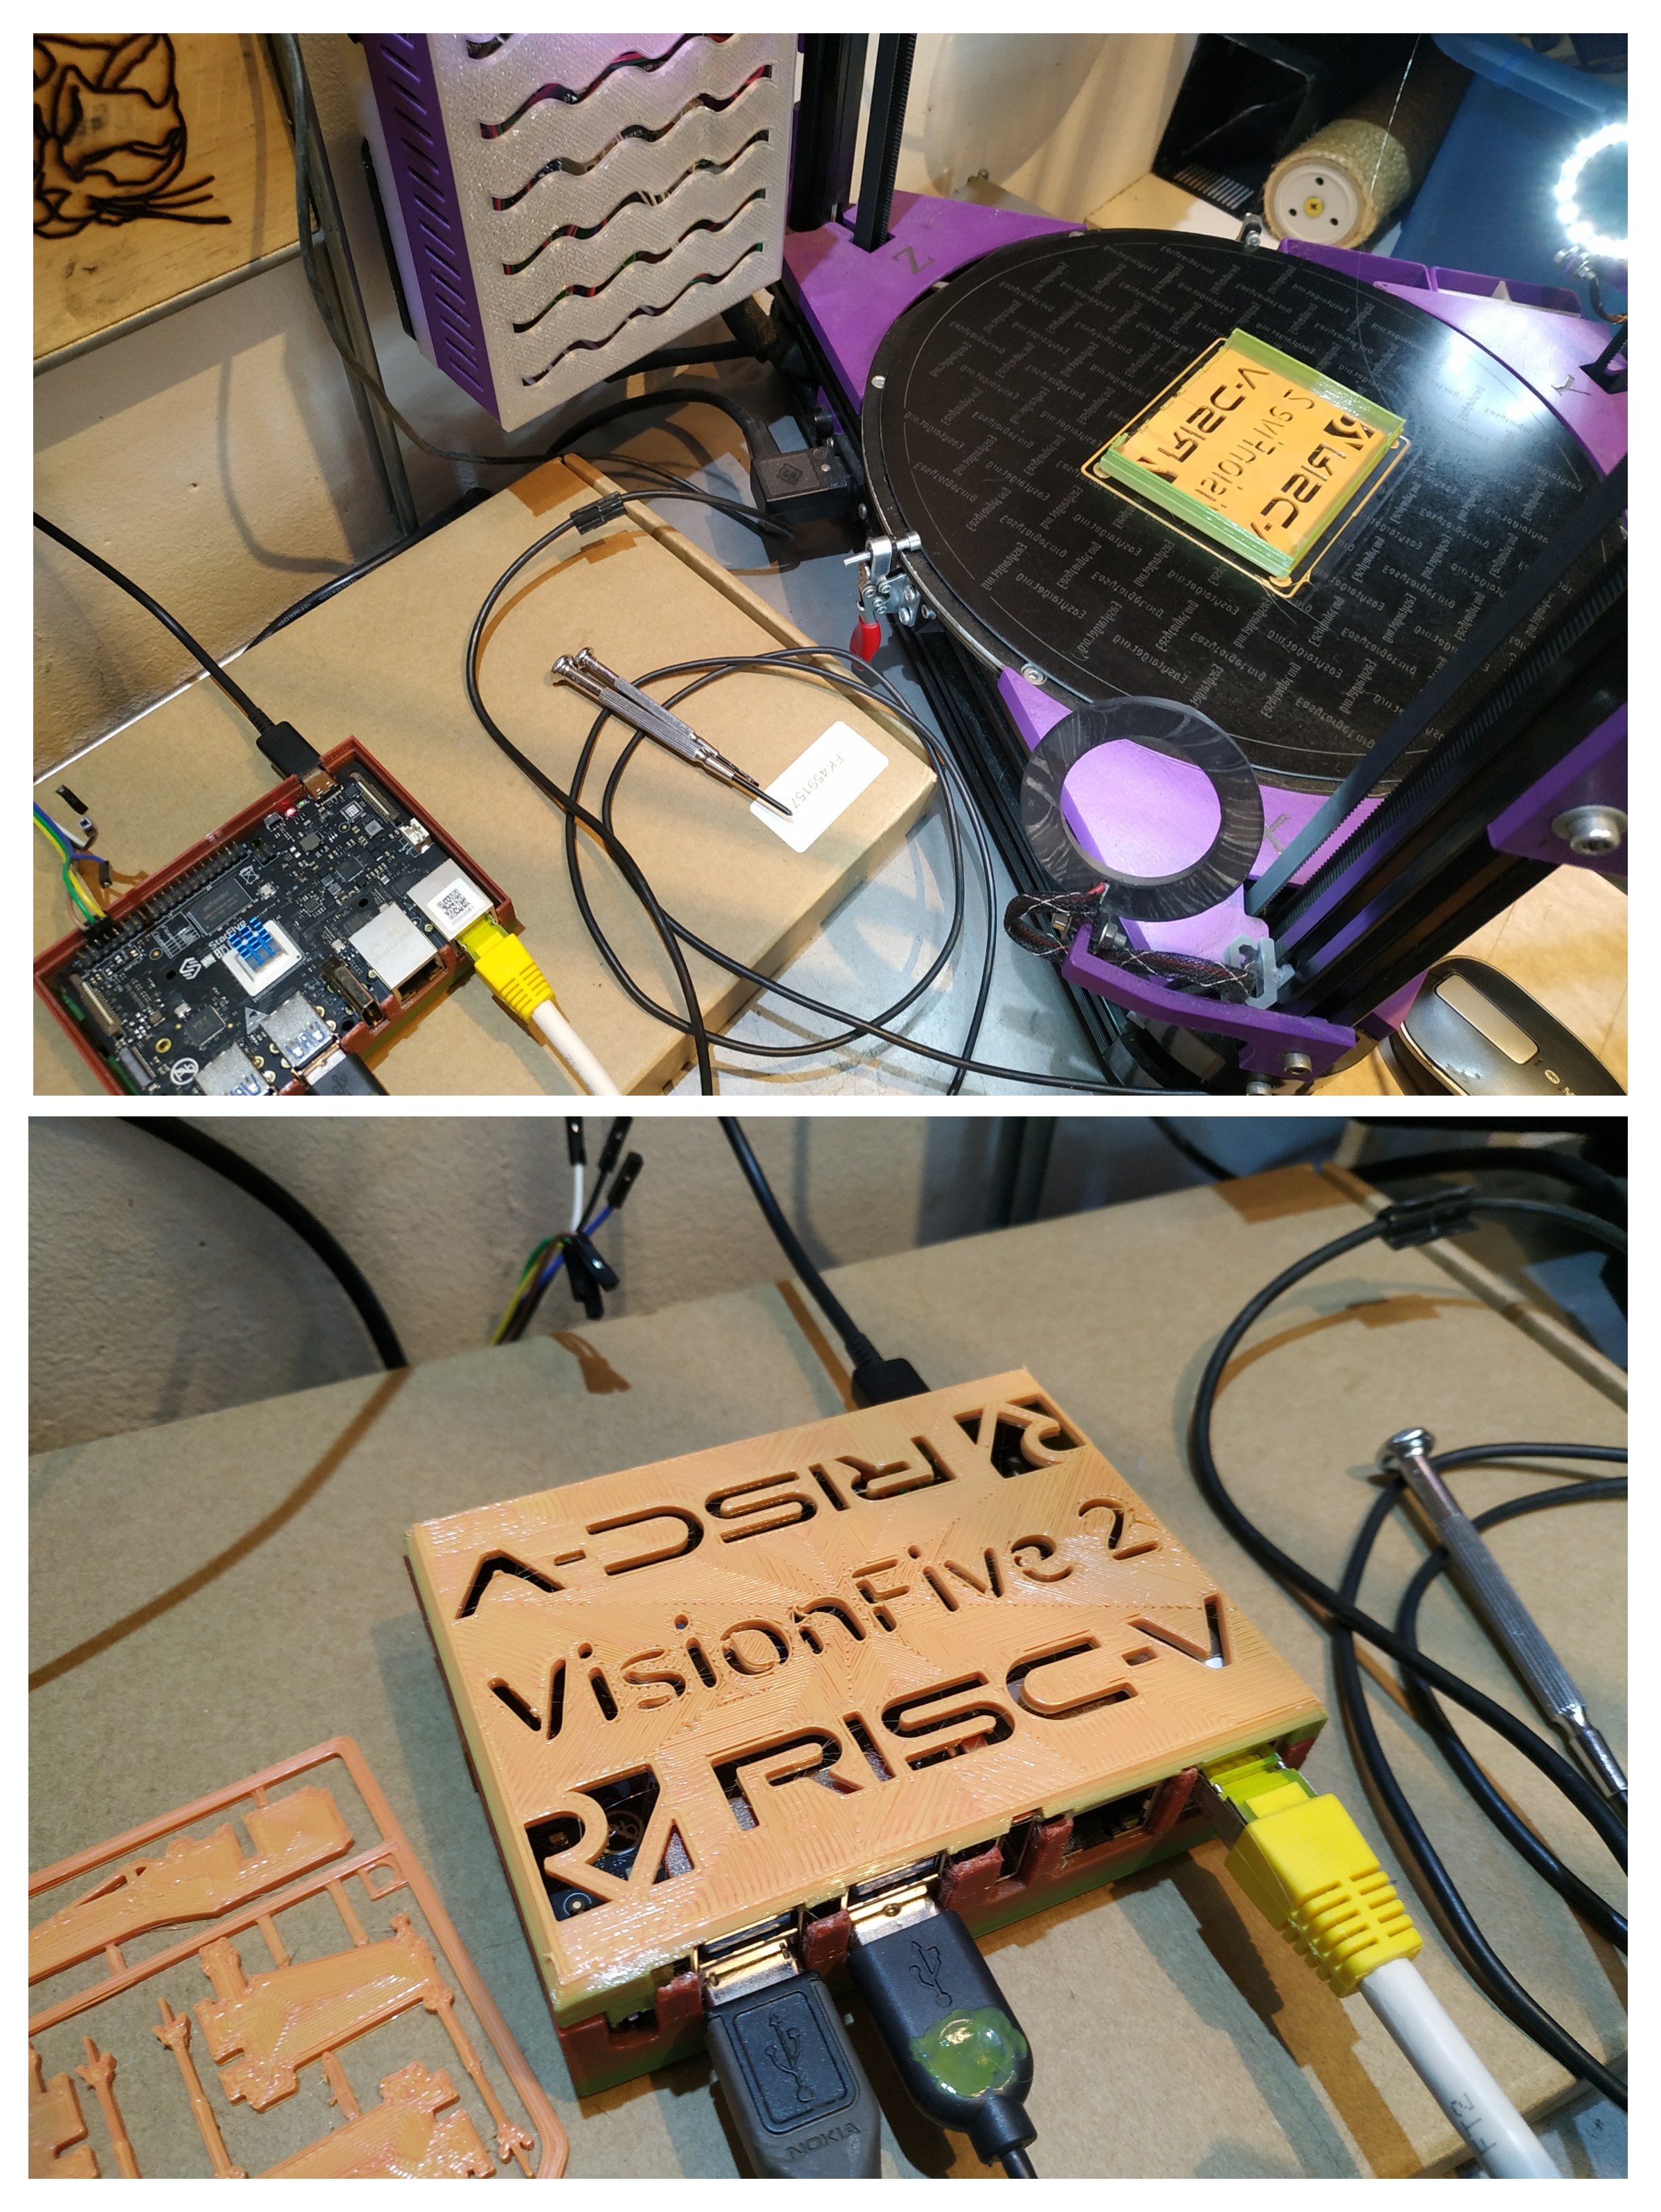
Here is something I knocked up by modifying the case from @chesapeake
I’ll post my bits on Thingieverse and update on that thread when done.
Also; This was printed by the VF2 itself, or at least by Octoprint running on the VF2 and filmed by mjpeg-streamer-experimental also running on the VF2. I /did/ have to rebuild my kernel to get USBSerial working, but apart from that everything was just the same as I’d do on a Pi.
2 Likes
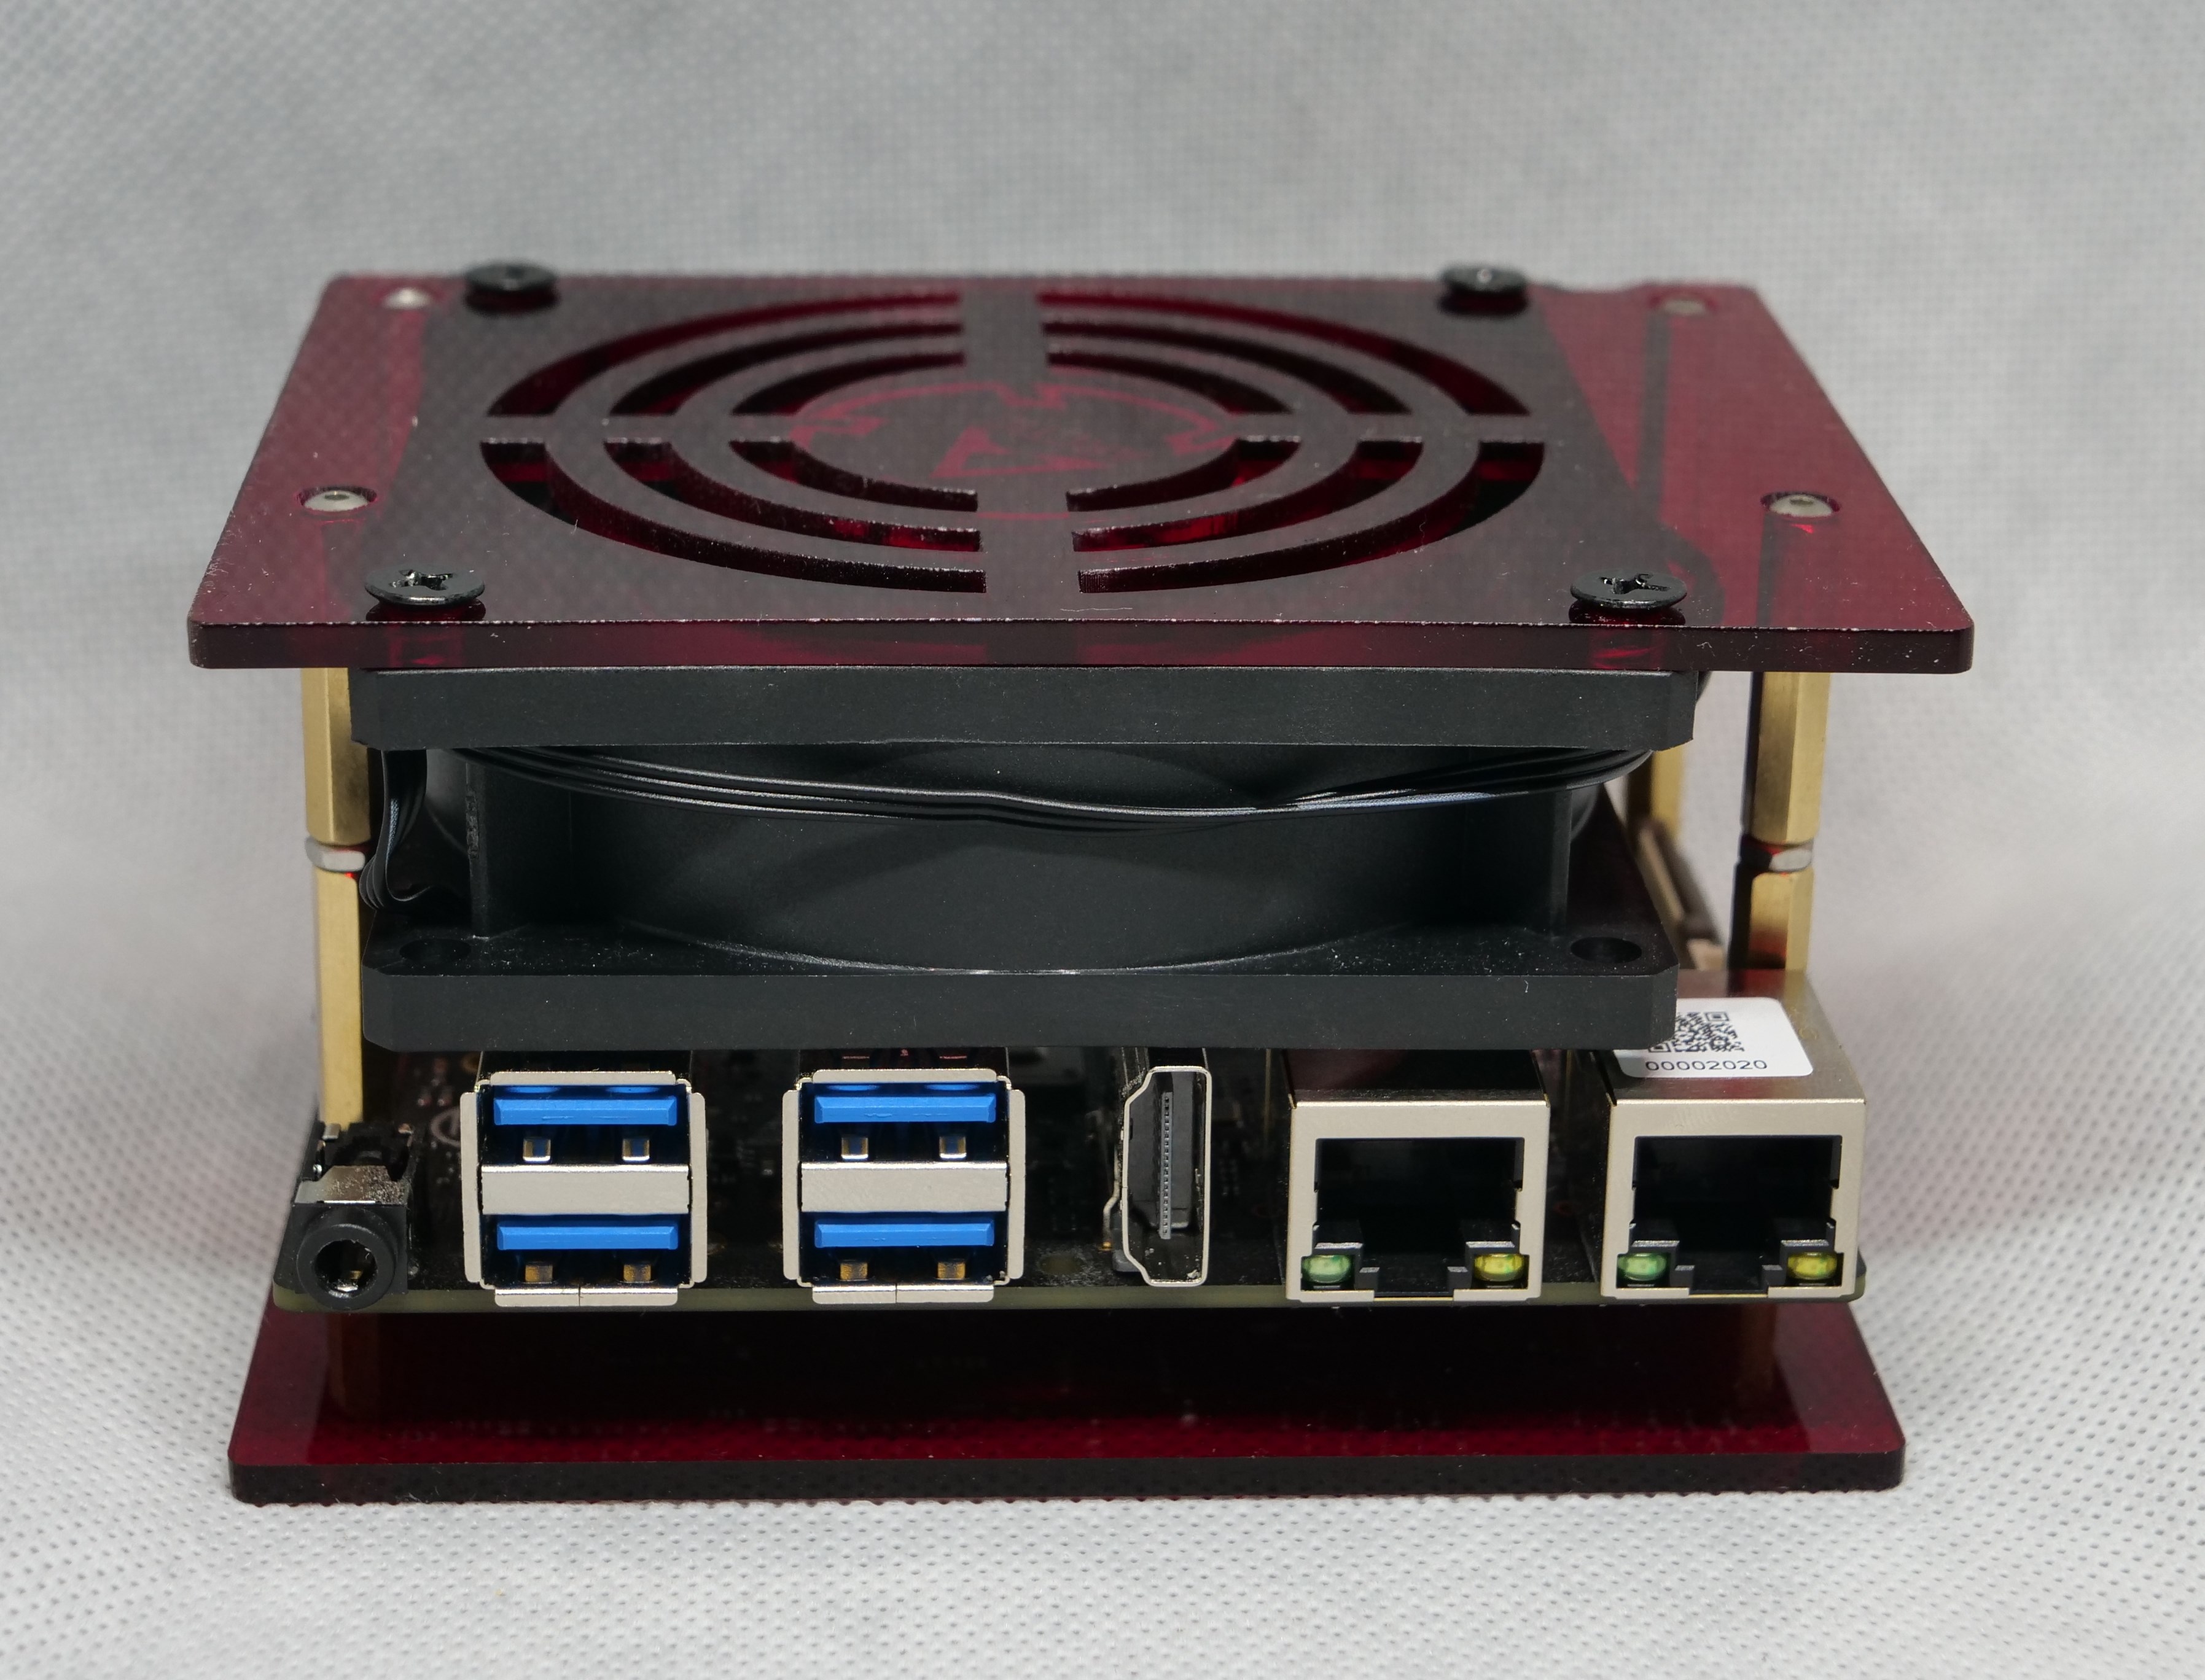
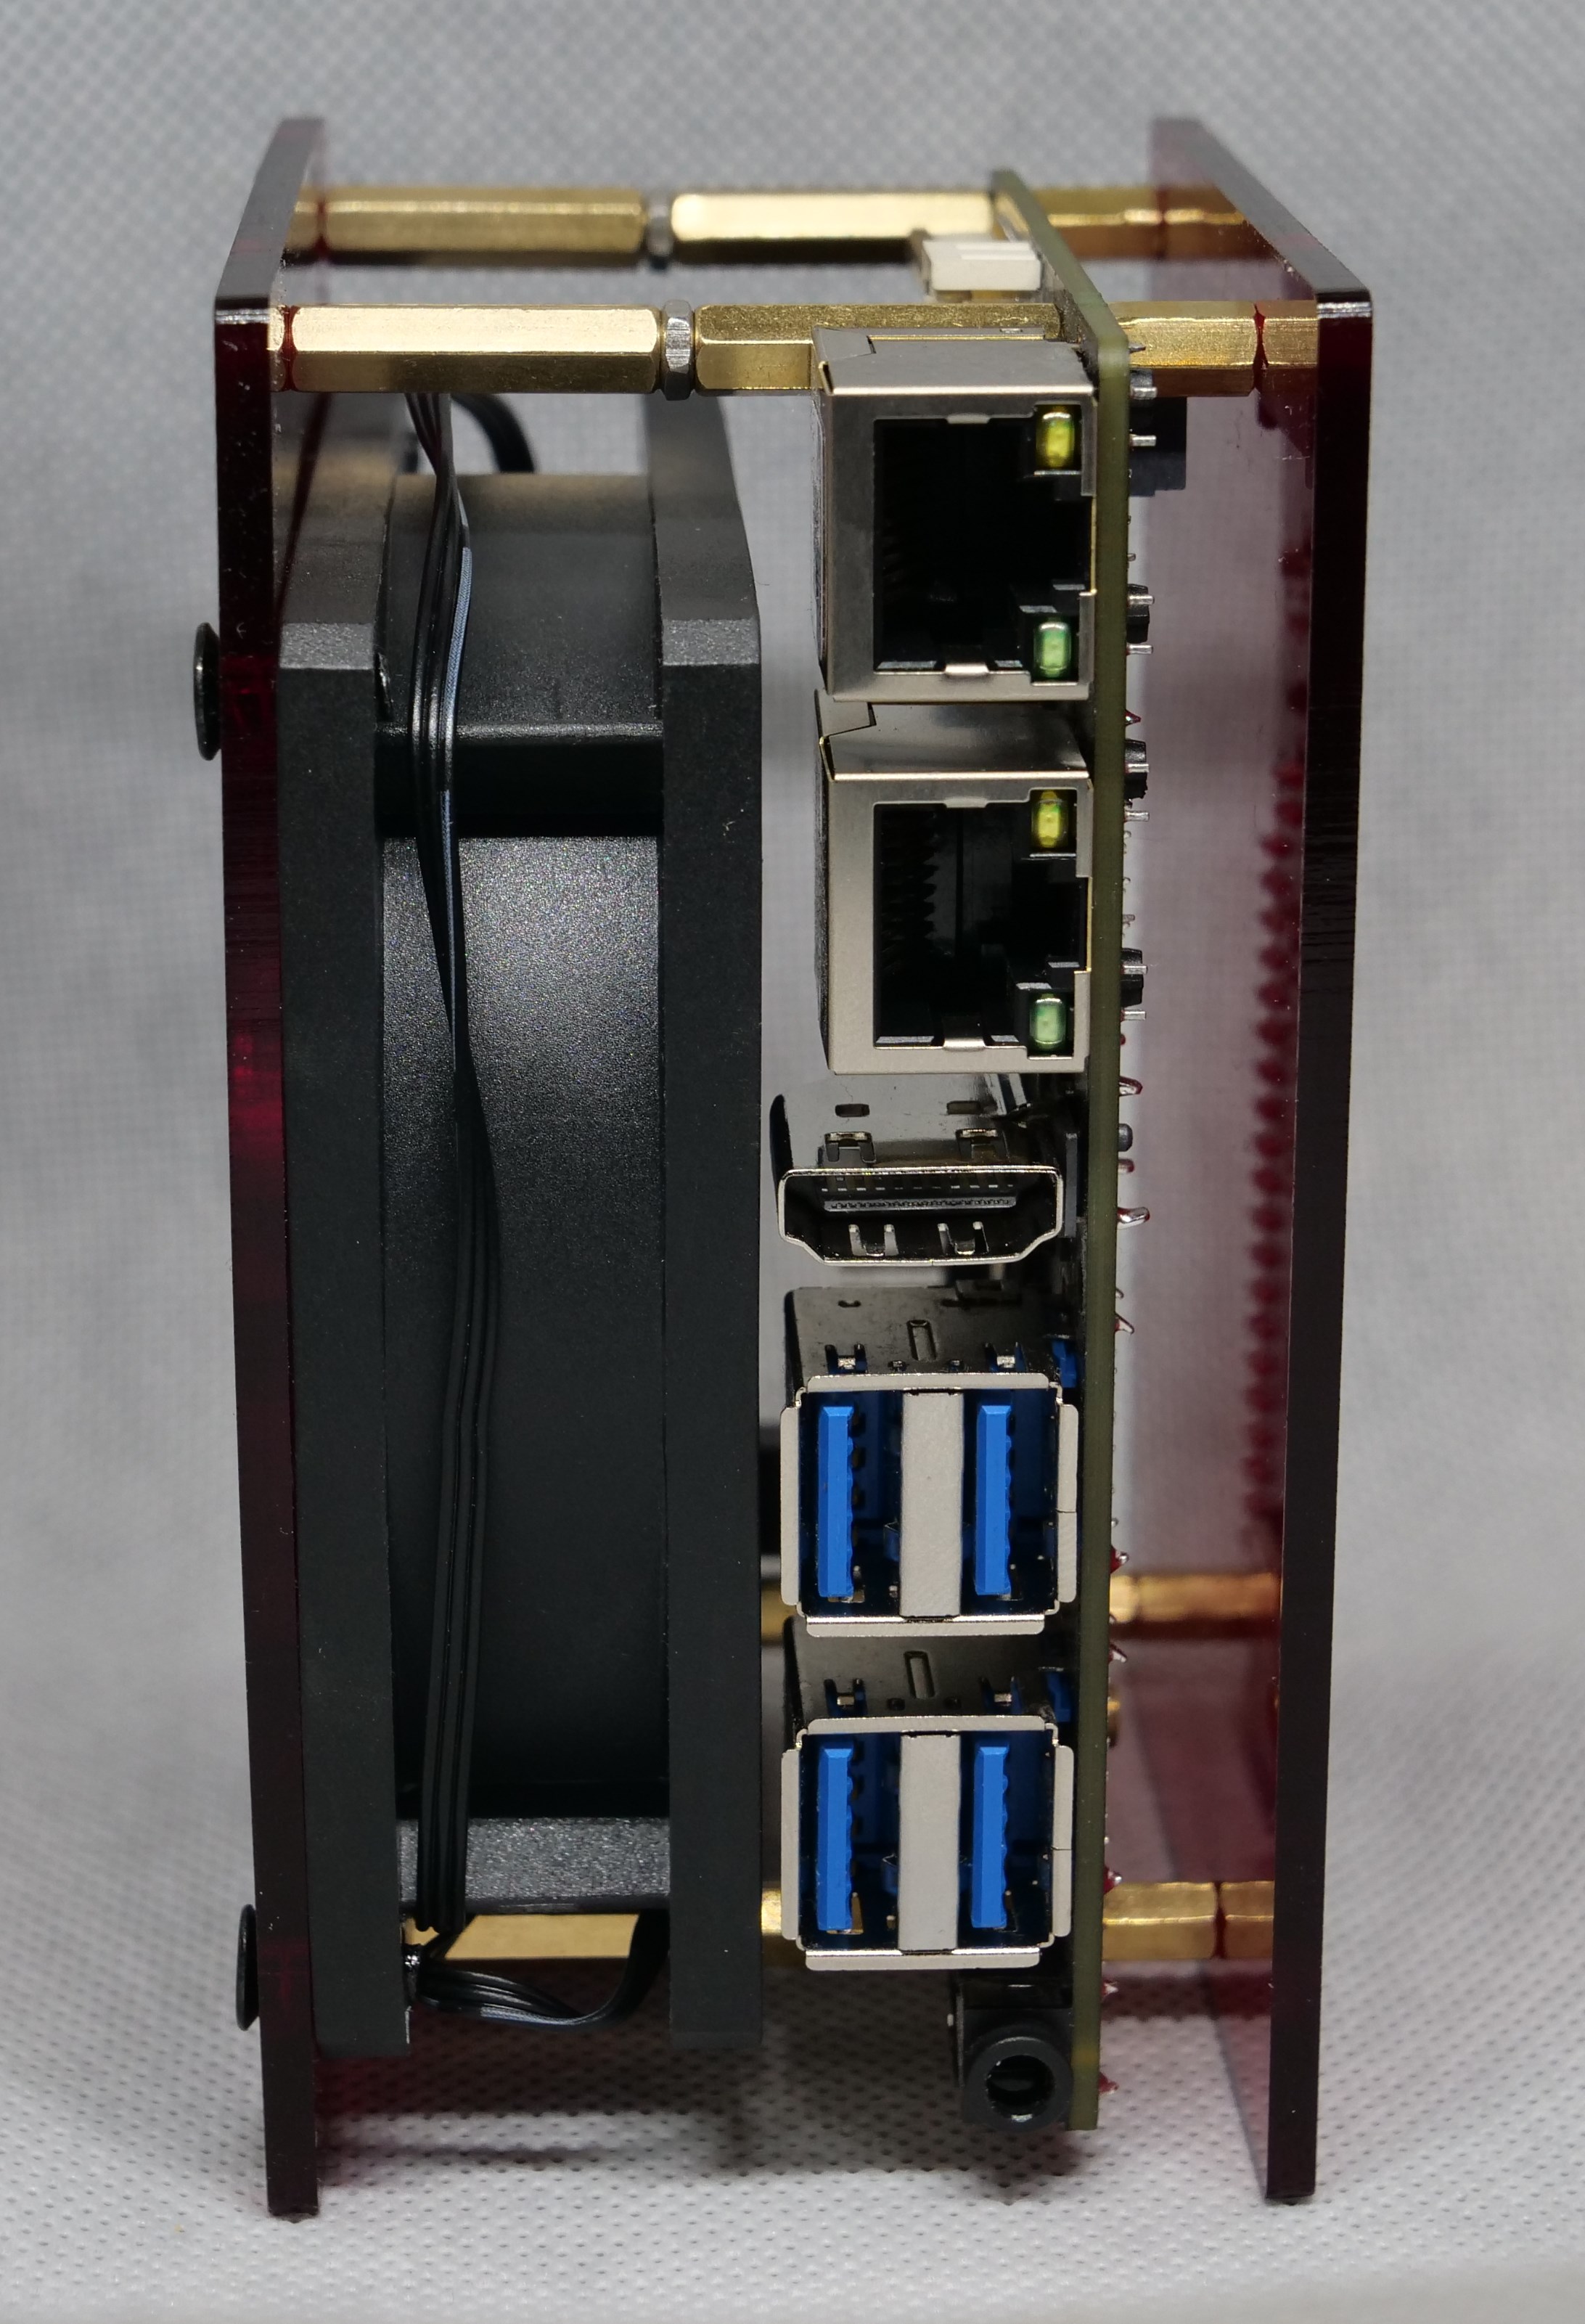
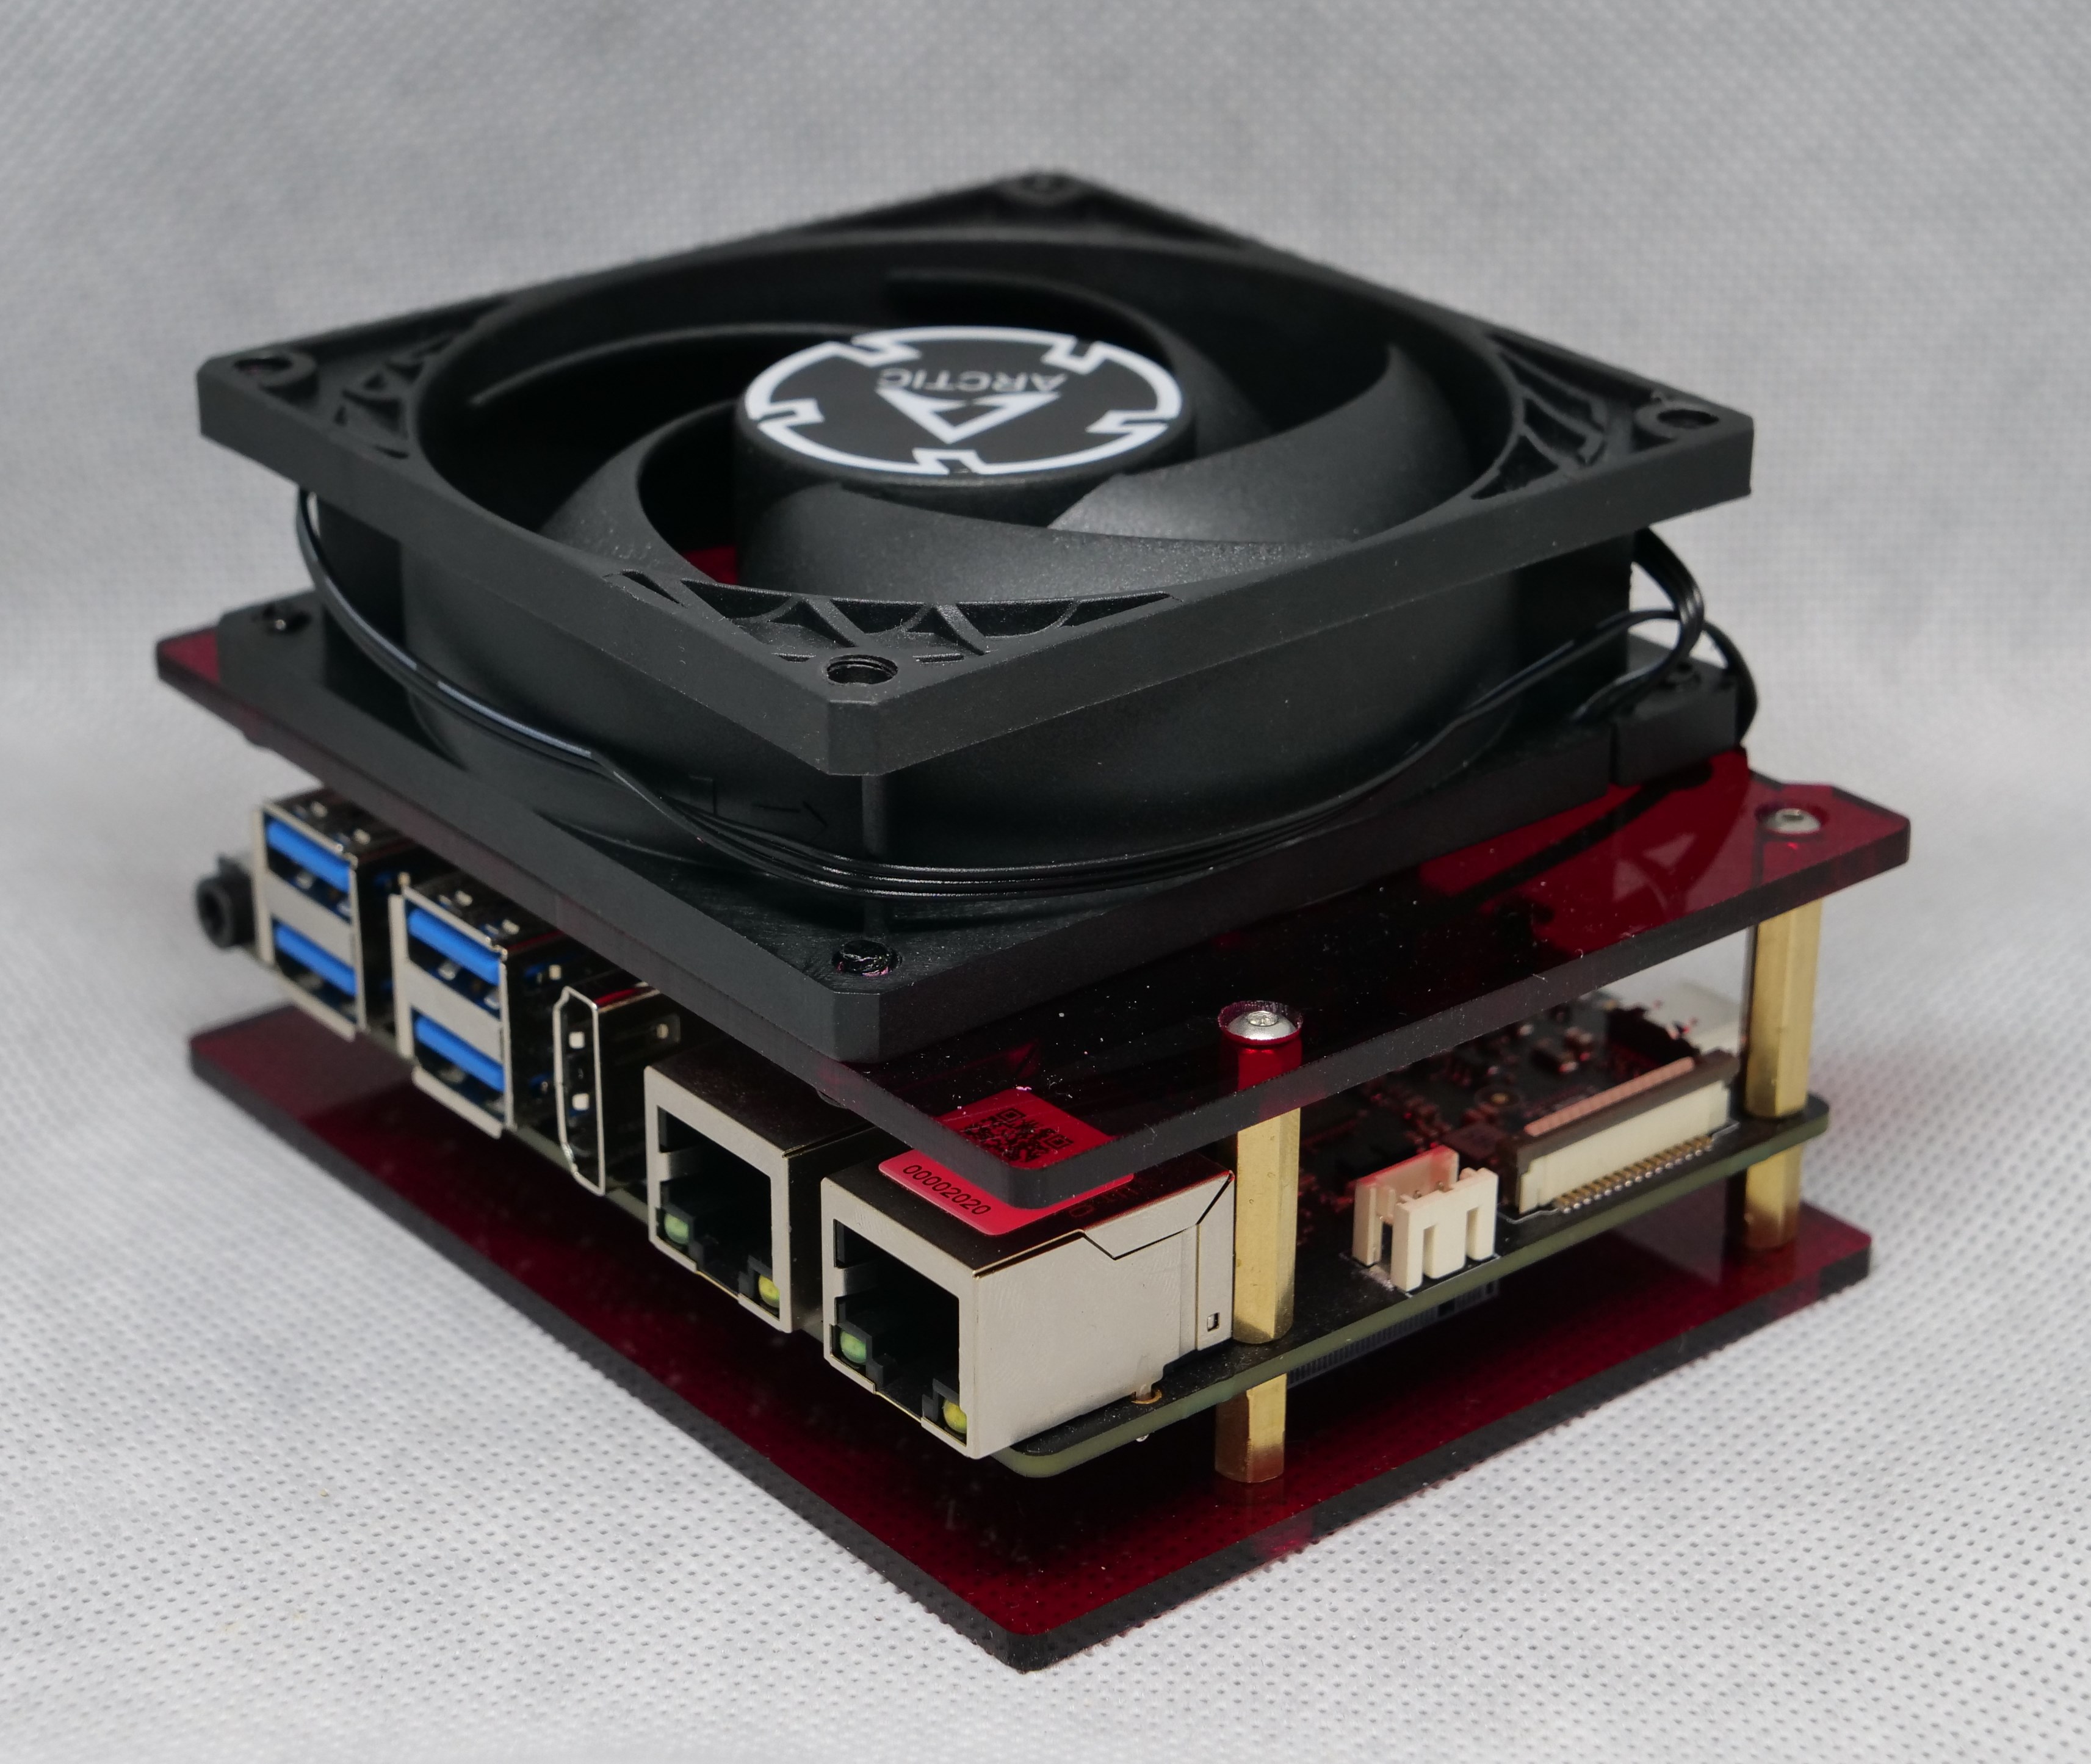
Sorry for the delay. Here is my prototype 80mm acrylic endpanel-style open case. Plenty of room for nvme to breathe.The fan is offset in the wrong direction; this will be fixed in future runs. Any feedback?
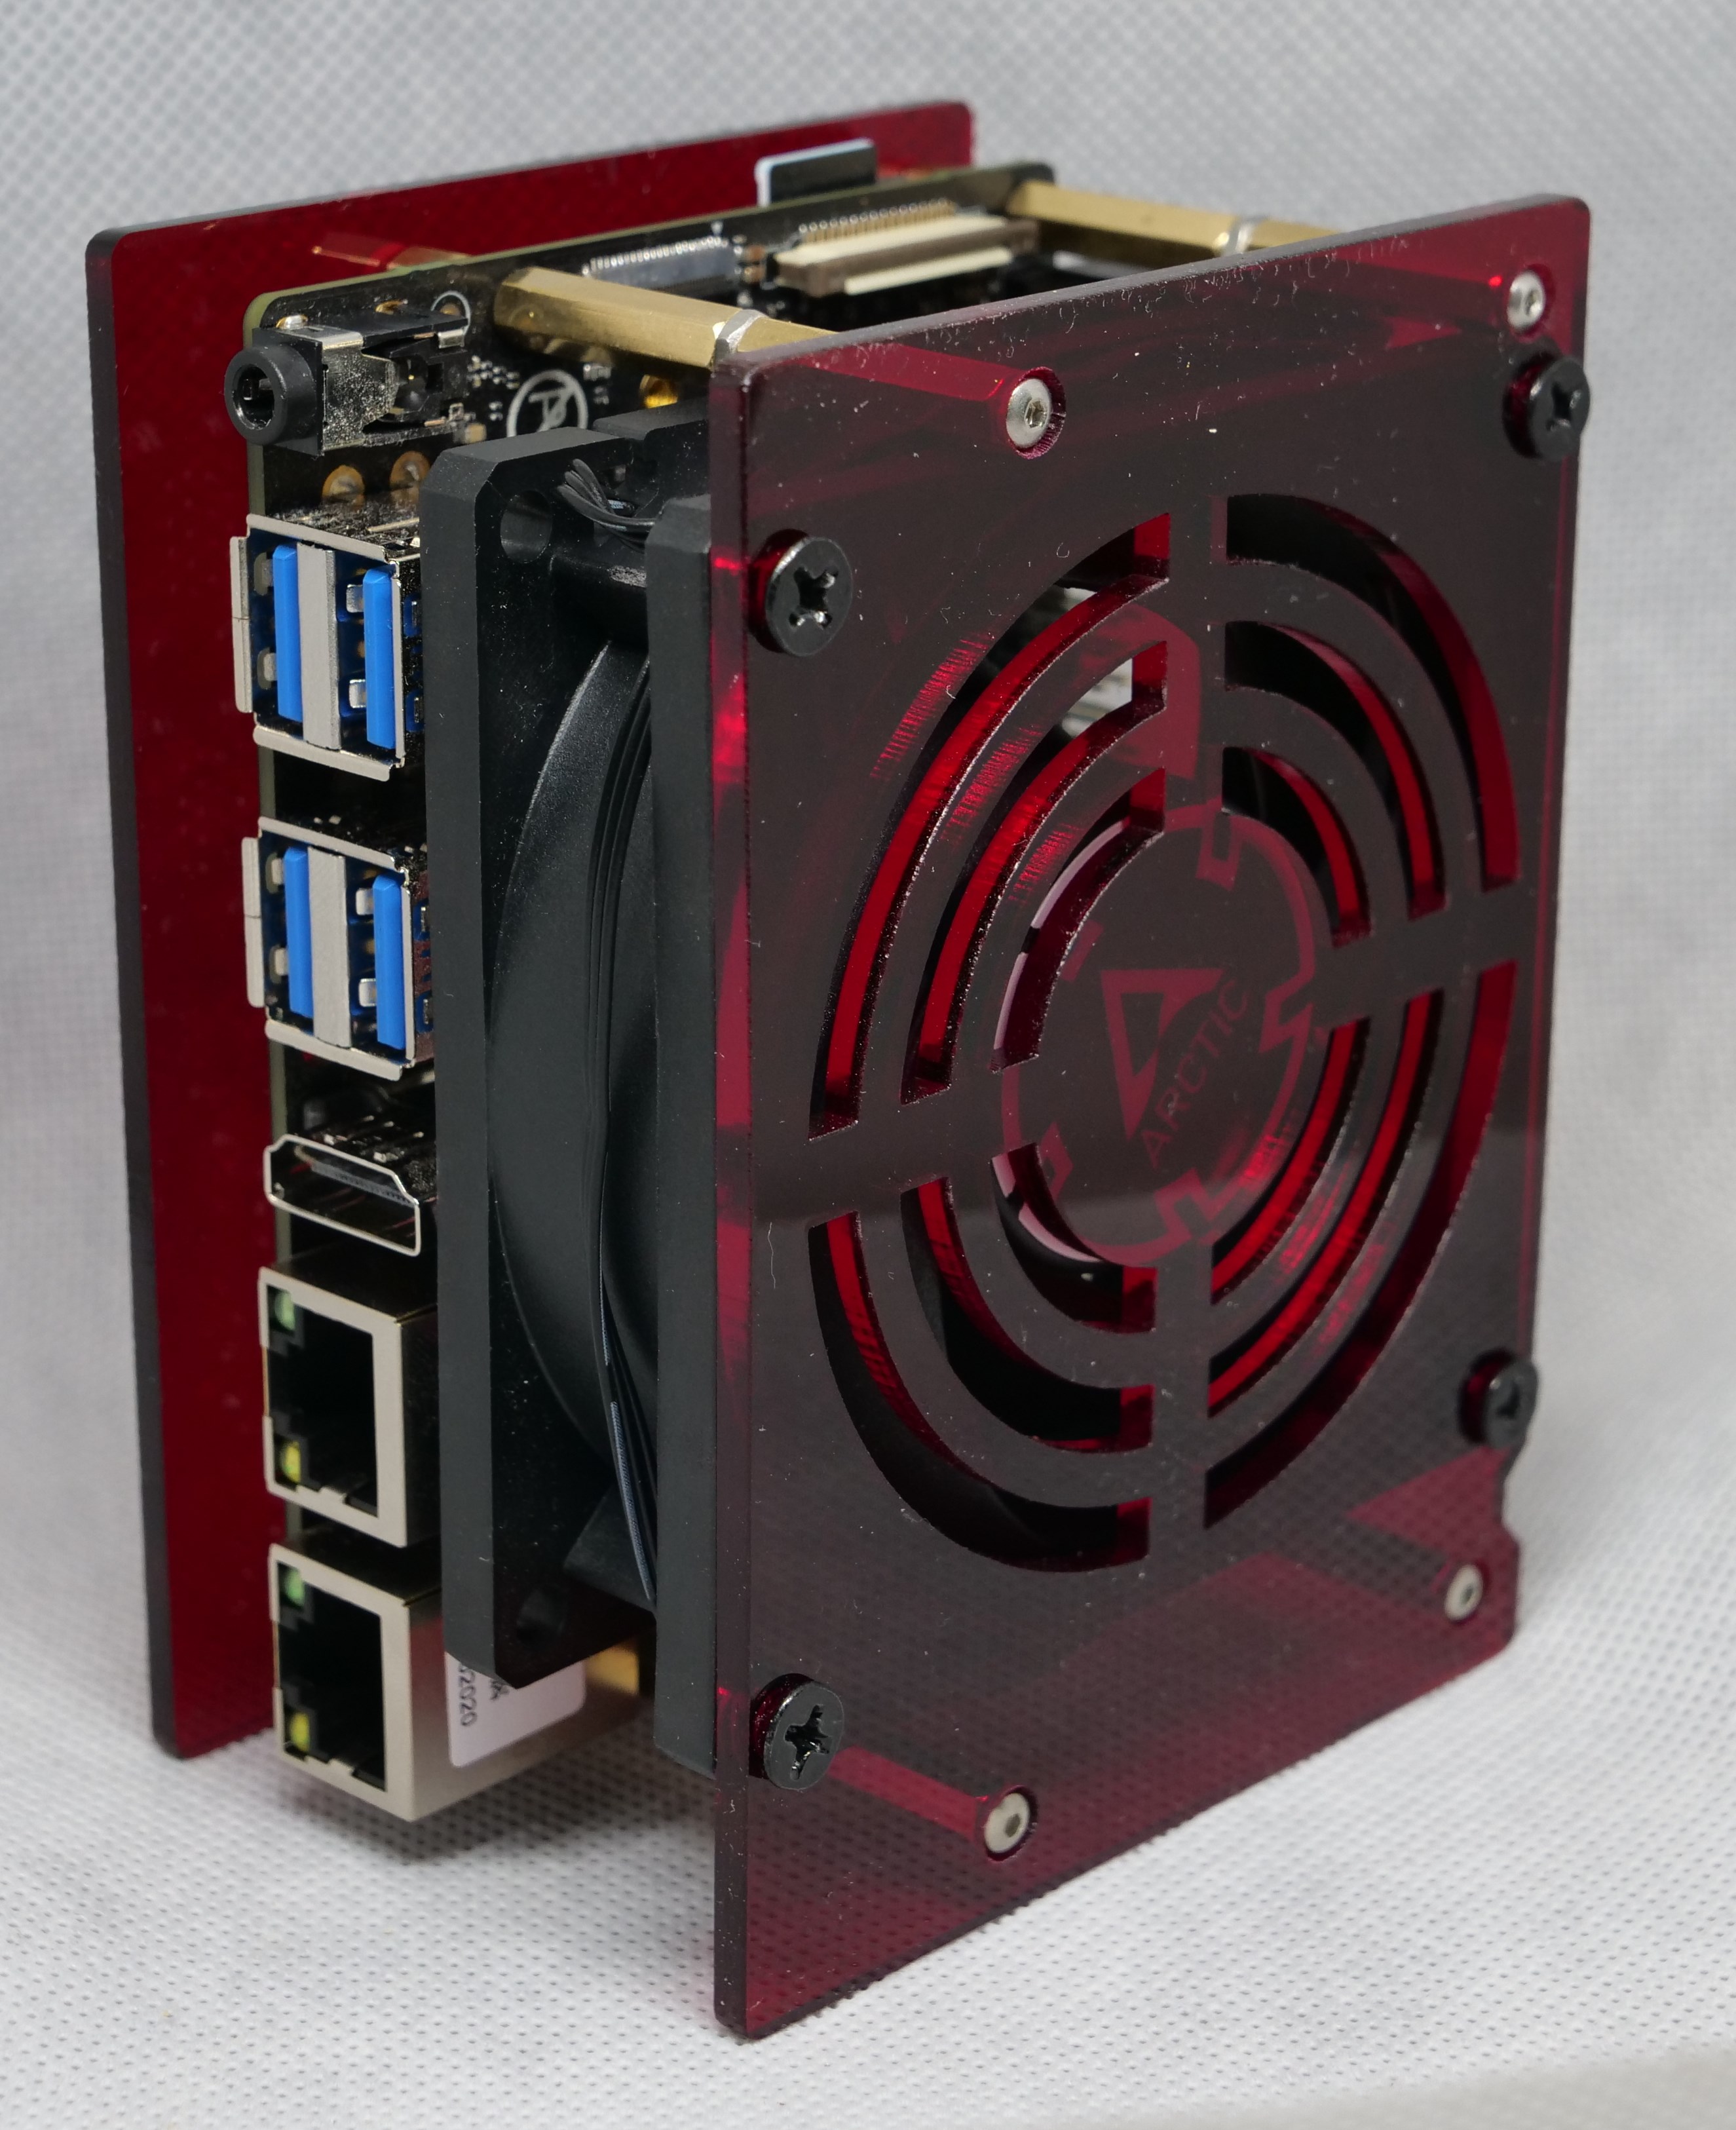
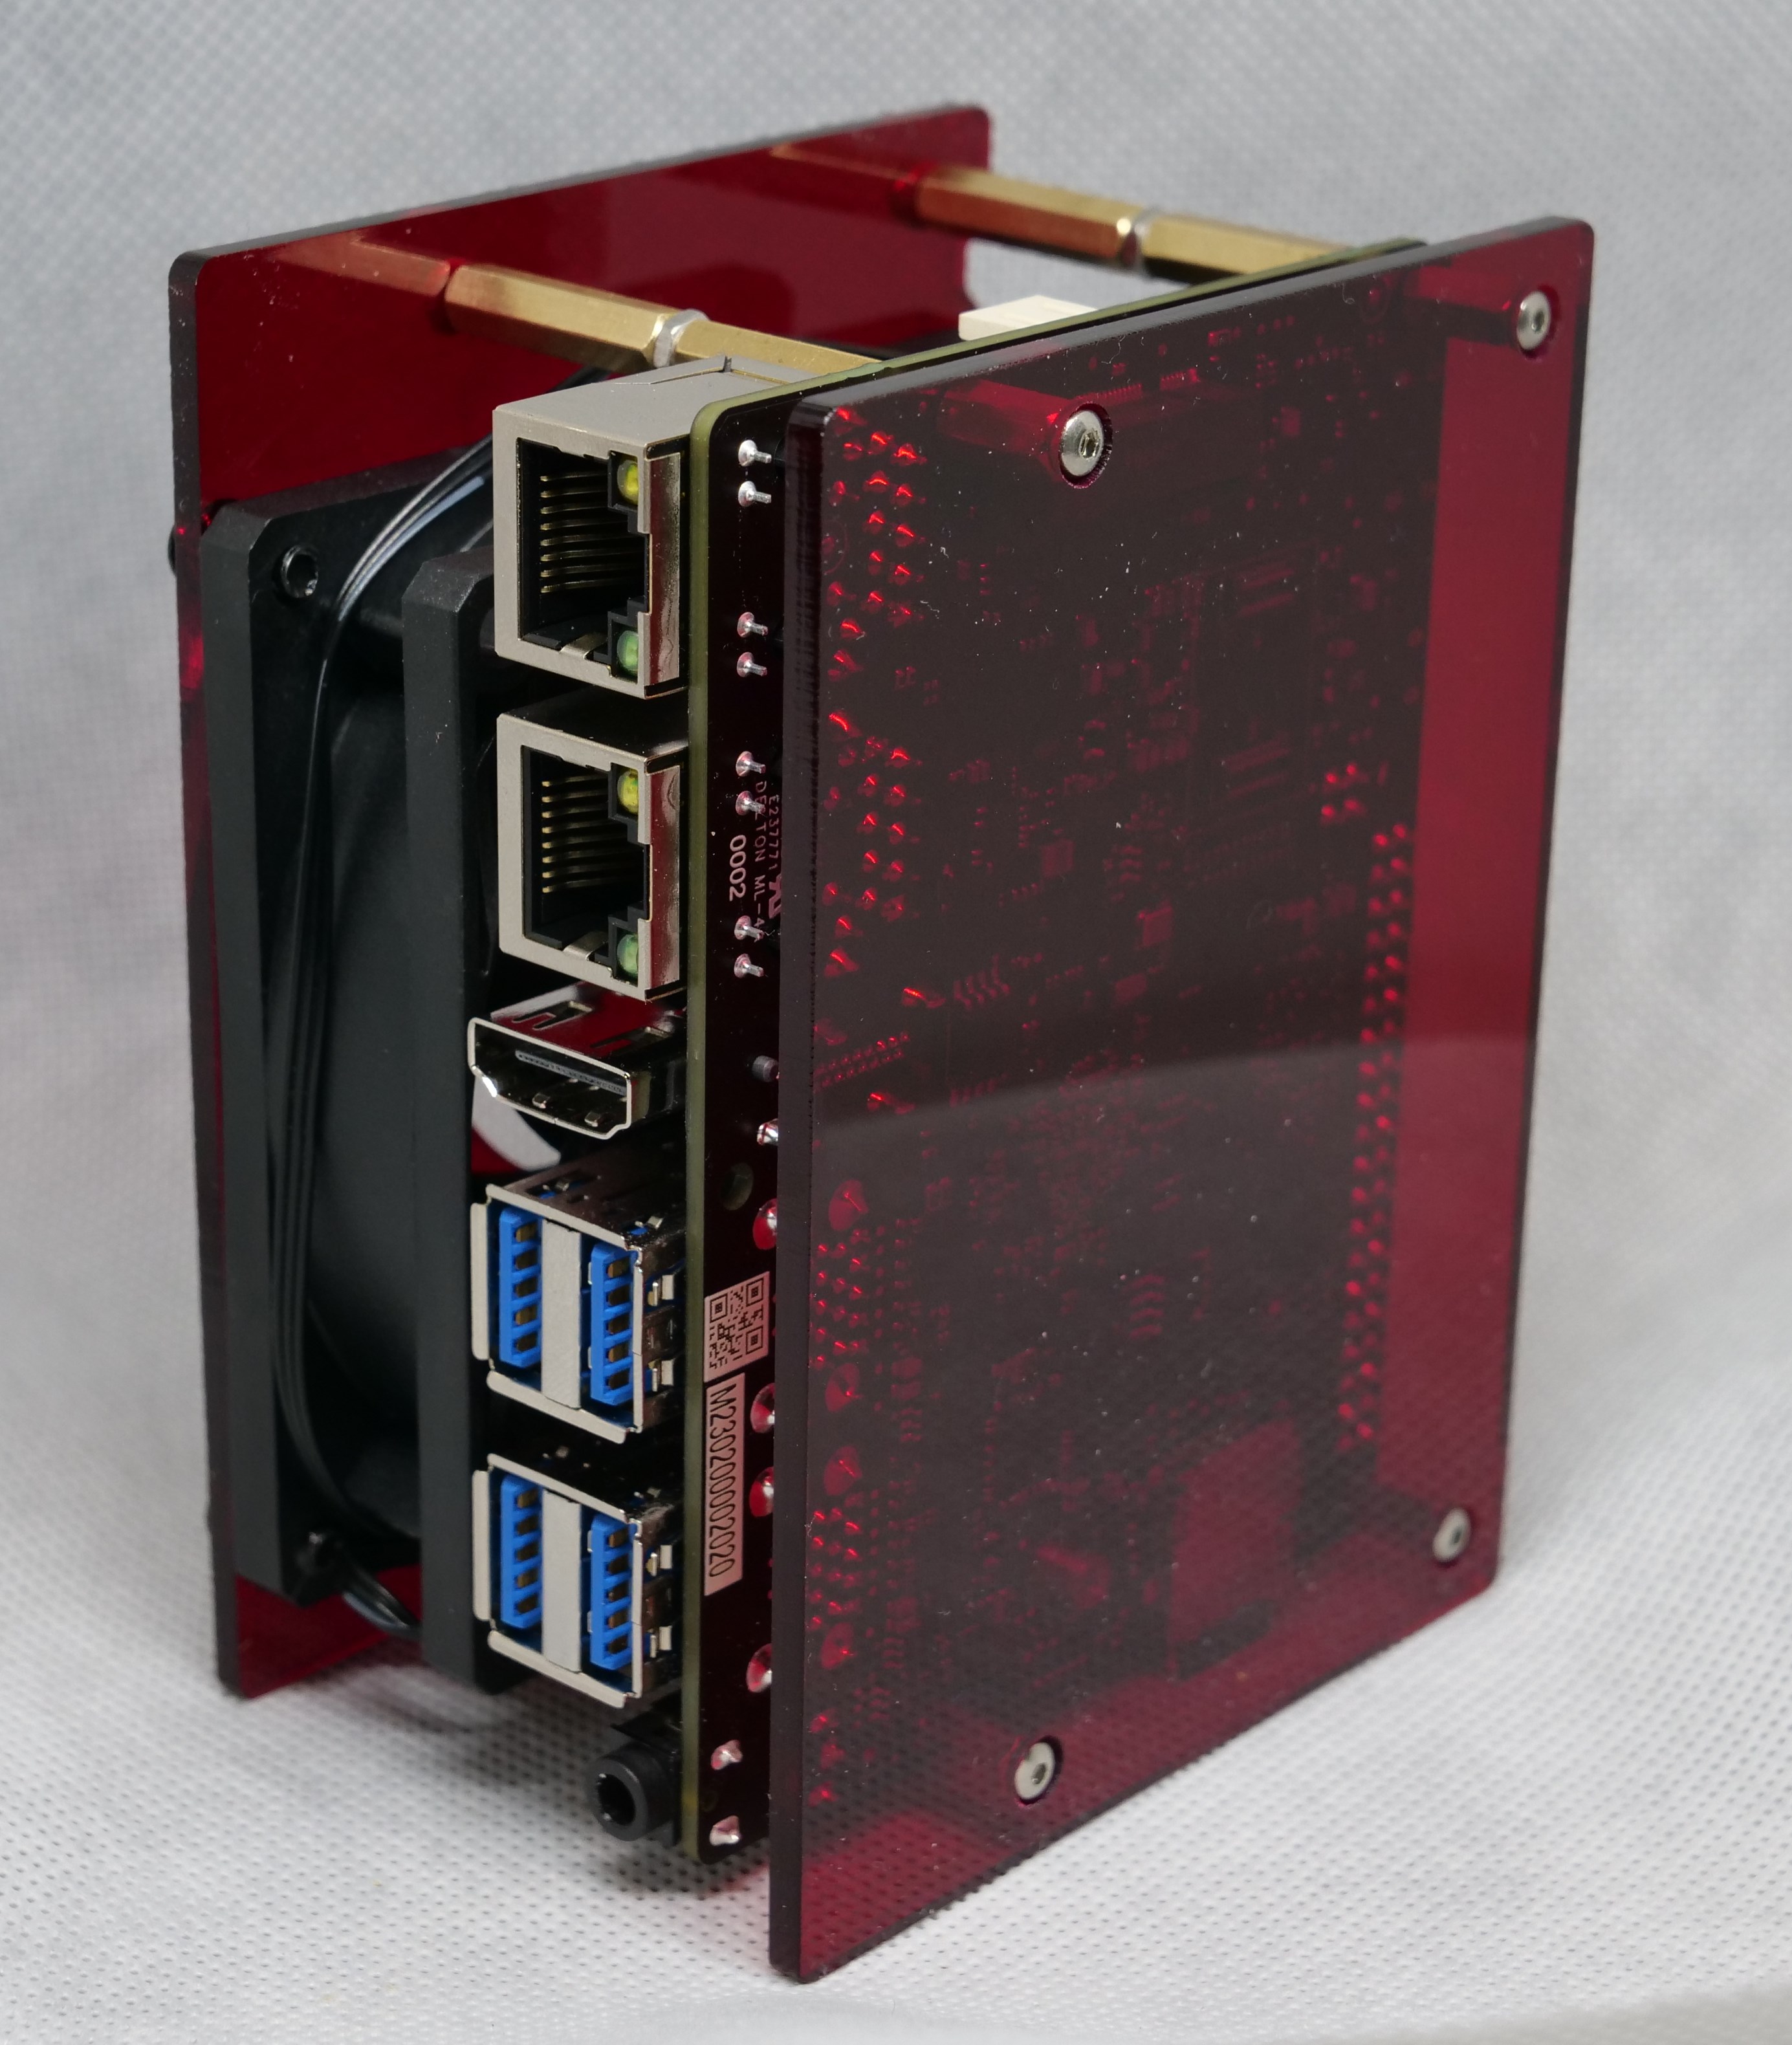
I’ve extended the size on each edge by 3mm from the board dimensions of 100x74mm. The case can be stood upright with the microSD either up or down and is very stable with the fan mounted inside. With the fan in the outer configuration, the machine will stand upright but can fall over easily.
Since internal GPU is practically unusable right now I may make an external separate case for a videocard. I would likely need to design m.2 to pcie-over-usb3 cable adapter compatible with miner adapter boards since I don’t see those available anywhere and I don’t want the main case to be any larger.
With a quiet 12V 80mm fan running at 5V, the machine is practically inaudible. While compiling software, SoC temperature never exceeded 45C (~21C ambient) in the 80mm configuration without any additional heatsink.
I still need to design a 60mm top plate. If you want something different let me know and I can probably design and make it.
If you want one of these, I can sell to persons in the US through my webstore. Can cut 80mm, 60mm and no-fan top plates. I have several colors of acrylic available (clear, dark red, dark blue, bright and dark green, probably more) and can mix/match or personalize/engrave.
I’ll also provide the LightBurn file if people want to cut their own.
More photos:
5 Likes
I like that quite a bit. However, I would like to point out the benefit of a dust filter here. It looks good when the fan blows the filtered air into the enclosure. Antistatic brushes are too repugnant to me, or maybe I’m just too lazy. ![]() There are various filters, with different thicknesses and different holders. Here is the front and back of a washable 40 mm filter that I often use:
There are various filters, with different thicknesses and different holders. Here is the front and back of a washable 40 mm filter that I often use:

1 Like
Air filters unnecessarily restrict airflow. With a 12V fan at 5V, there is hardly any airflow. This is an open chassis and the SoC doesn’t even really need active cooling - I just did this because I could, and because I do long compiles (Gentoo) and don’t want to have to keep watch and over SoC temperatures or make sure temperature-related failsafes work.
With low airflow, low heat concern, and open case, dust is not a concern.
If someone wanted to use a dust filter with this, then go for it. But it’s completely unnecessary.
I see see no airflow where the NVMe may be located. And I wonder if the fan was on the side blowing cold air over the top and bottom of the full copper PCB (printed circuit board), might be more efficient at cooling (cooling two full surfaces at once instead of one). Since it is an 8 layer PCB that is potentially a lot of copper that might be useful in extracting heat faster. Usually bigger hotter chips have lots of voltage and ground plane connections. Although how beneficial, depends on where the ground and voltage planes are positioned within the PCB stack. If they are the near the top and bottom layer, great for cooling - but usually they are close to each other on boards that operate at gigahertz frequencies.
1 Like
Correct. In practice though, no NVMe drive will ever overheat in this enclosure.
VF2’s IO performance, even sustained, just isn’t high enough to cause heat stress to any modern NVMe drive. Others have tested with more enclosed cases than this and drive temperatures remained low. I provided a large gap on the NVMe side to allow for convection. The only concern would be a high ambient temperature environment, but this case is designed for desk / client use as it is an open case.
If someone had a specific need for active cooling over nvme, say for use with some custom accelerator, I could design it and provide a cooling plate for it. As of now I know of no specific use case and see it as unnecessary.
Yes, it could, but how to do that with two pieces of acrylic? And the VF2 is not thermally stressed. Is it worth it?
My request for feedback was more about potential issues with this design, or things people would want and use based on this design. What you are asking for is a completely different type of design that might have benefits.
As it is, a fan is already unnecessary for VF2. Under a sustained compile scenario, with the 80mm fan, the reverse side of my board is quite cool to the touch using only the 80mm fan. Without the fan the SoC gets toasty but the board is effective at shedding away heat. A side fan style enclosure - at least one that is practically silent like this one is - would likely make for an even larger case. The fan would also need to mount in an odd way to the acrylic - may need to use a ducted fan or something. This case is two simple pieces of acrylic and some standoffs to provide protection, and has the ability to mount a dirt cheap quiet 80mm fan to it. This kind of case you are describing isn’t like this and may be more suited to additive manufacturing technique.
2 Likes
I say that the cooler the board the better:
Generally agreed. Even though unnecessary, I still wanted it, and maybe others will too =)
1 Like
I really like it, nice and practical case. Best of all it is something anyone capable of some accurate cutting and drilling can make for themselves. Without needing a 3d printer or laser cutter.
The fan made me boggle at first, but once I twigged it’s a 12v one it made a lot of sense.
Thank you @true, for the design. From what i know about the board, it makes a lot of sense.
Do you consider to deliver to outside the US, too? Not everyone can cut such a grill.
Below a fan-less construction more geared towards experimentation and light load, if it helps. Hmm, countersinking the screws into the base plate, as you did, would definitely give the structure more stability on a table.
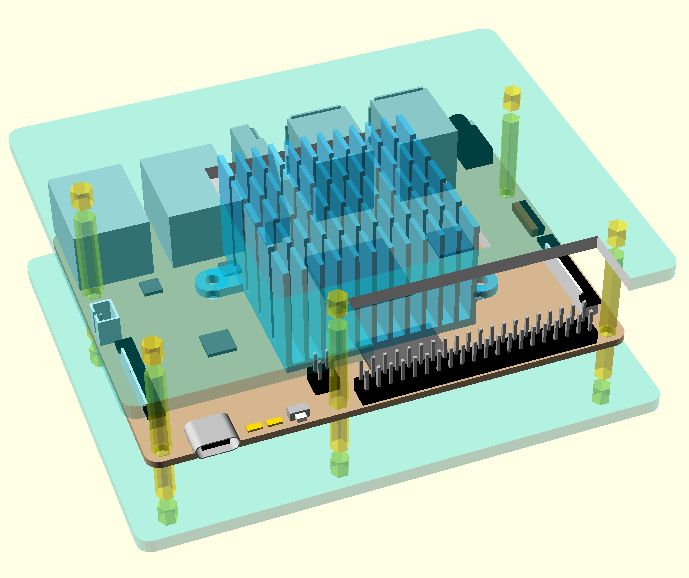
But your construction is superior when one wants to use the board beyond experimentation. A passive 4x4x2cm sink like above would not be able to work against the heat produced under longer (> 30 min) loads. While i have given access to the extender, practically, i am using only the UART pins, which can be permanently mounted. Perhaps you can post a picture showing the extender, too?
1 Like
Perhaps, @true, since you often run your device under high load with your enclosure, you can post the NVMe temperature under this condition. My expectation is, that it would fall into a temperature balance with the CPU. Thus if your ambient/loaded figures 21C/45C should go for the NVMe as well.
With my LaserWeb dev hat on… Could you also provide a svg file? ![]() it’s the most portable common format for the web (or in
it’s the most portable common format for the web (or in dxf, but svg is more portable).
This also allows people to bypass things and open the SVG in Chrome, print it at original size, glue to some plywood and cut out. Before I had my own lasercutter I did this several times when making a clock case.
Re: 12V 80mm fan, yes, just a simple PC case fan. The GPIO pins aren’t in the correct order, but if they are swapped around in the connector then one can use the GPIO header and not need a custom connector. The only downside is the fan always runs when plugged in in this configuration. The positives are wide availability and no need to cut, solder, crimp or make a new connection.
Re: sales outside USA, the issue is shipping cost. If you’re willing to pay to have it shipped then sure I could do it, but shipping from USA is cost prohibitive. For example I think a basic small package to Canada is already near $15USD.
Re: no-fan plate, it would look similar to the photo you showed with a cutout area for GPIO. The 60mm fan version would be like this as well. Could even cut a bunch of holes in these, to allow for self-tapping M3 and M2.5 screws to mount things.
What do you mean by extender?
Re: nvme storage, I am waiting for PCIe performance and built-in GPU to be improved and fixed respectively before using it. If built-in GPU doesn’t improve soon then I’ll likely use this with an external GPU and deal with slow storage. Others here have reported temps around 10-15C above ambient during use in various mounting configurations.
Re: SVG, This was a simple design that I did directly in LightBurn. Would have to see if I could export to SVG. It may be possible.
1 Like
Maybe, put a 40/60mm fan on left/right side is a chose.
Half top , and half bottom .
Hmm, one could run the 12V fan on the 5V fan header, despite the different voltage, but the usual fan plugs do not match the fan header? Is this why you connected it to the GPIO pins? I saw a fan with a XH 2.54-2 pin connector, but the fan header is under-specified.