星光派单板计算机上,提供了40Pin接口,具体如下:
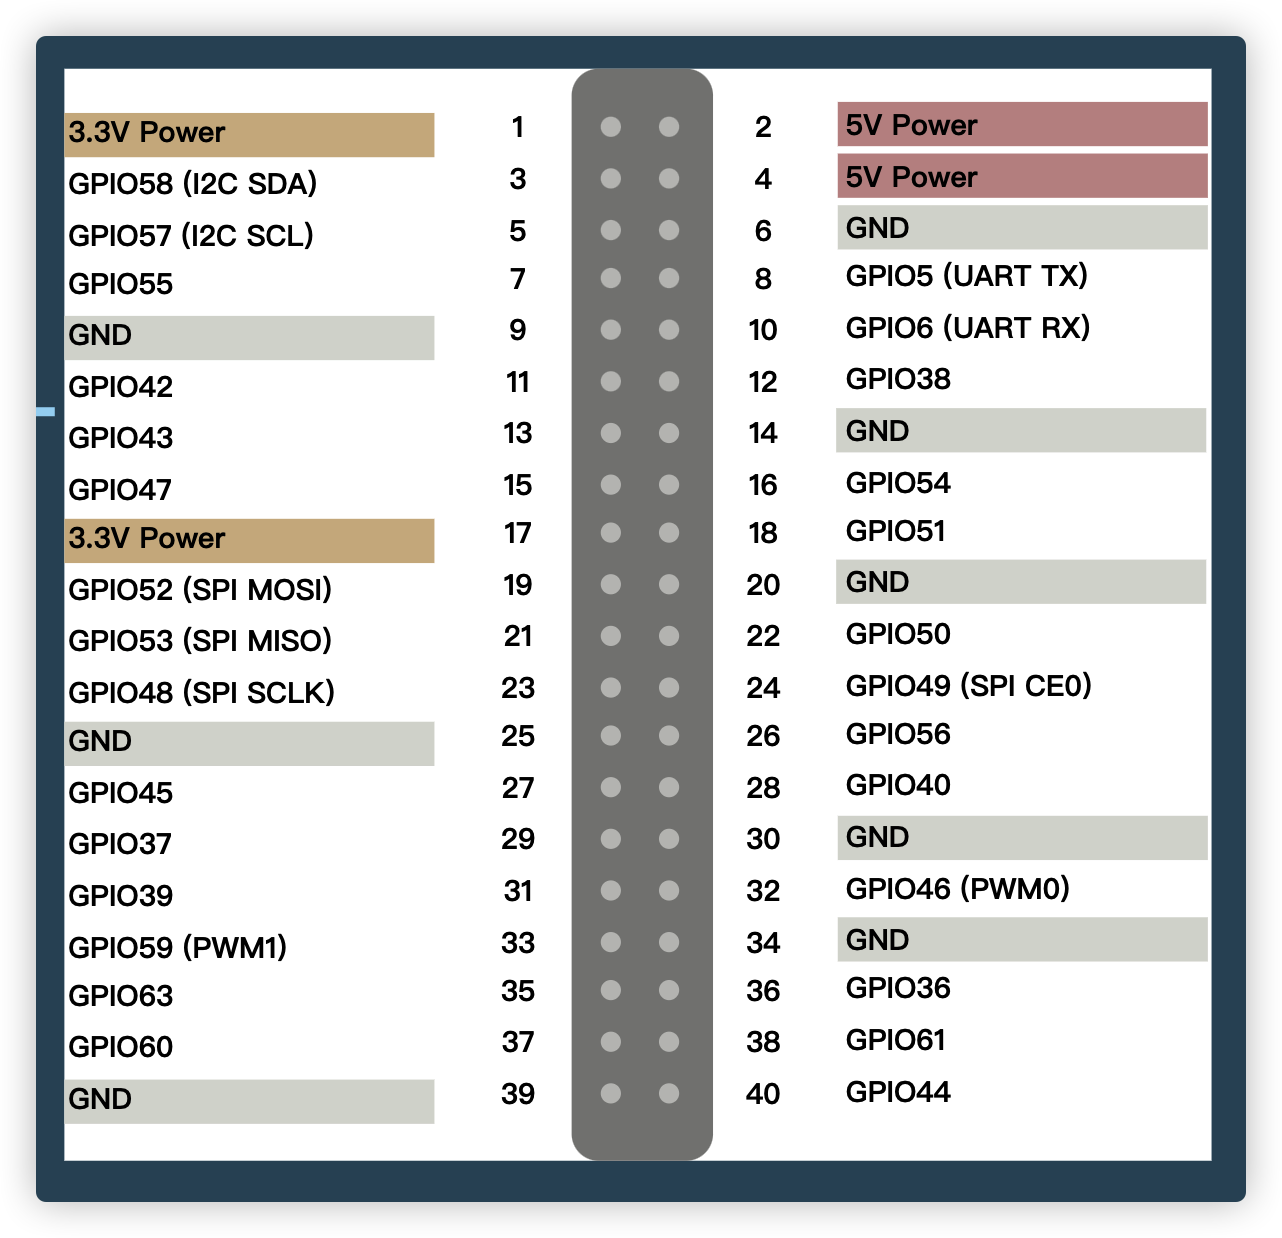
其中有I2C接口,可以插上SSD1306 OLED小屏幕。
然后用Python闭编程,在这个小屏幕上显示一些系统的信息,效果如下:
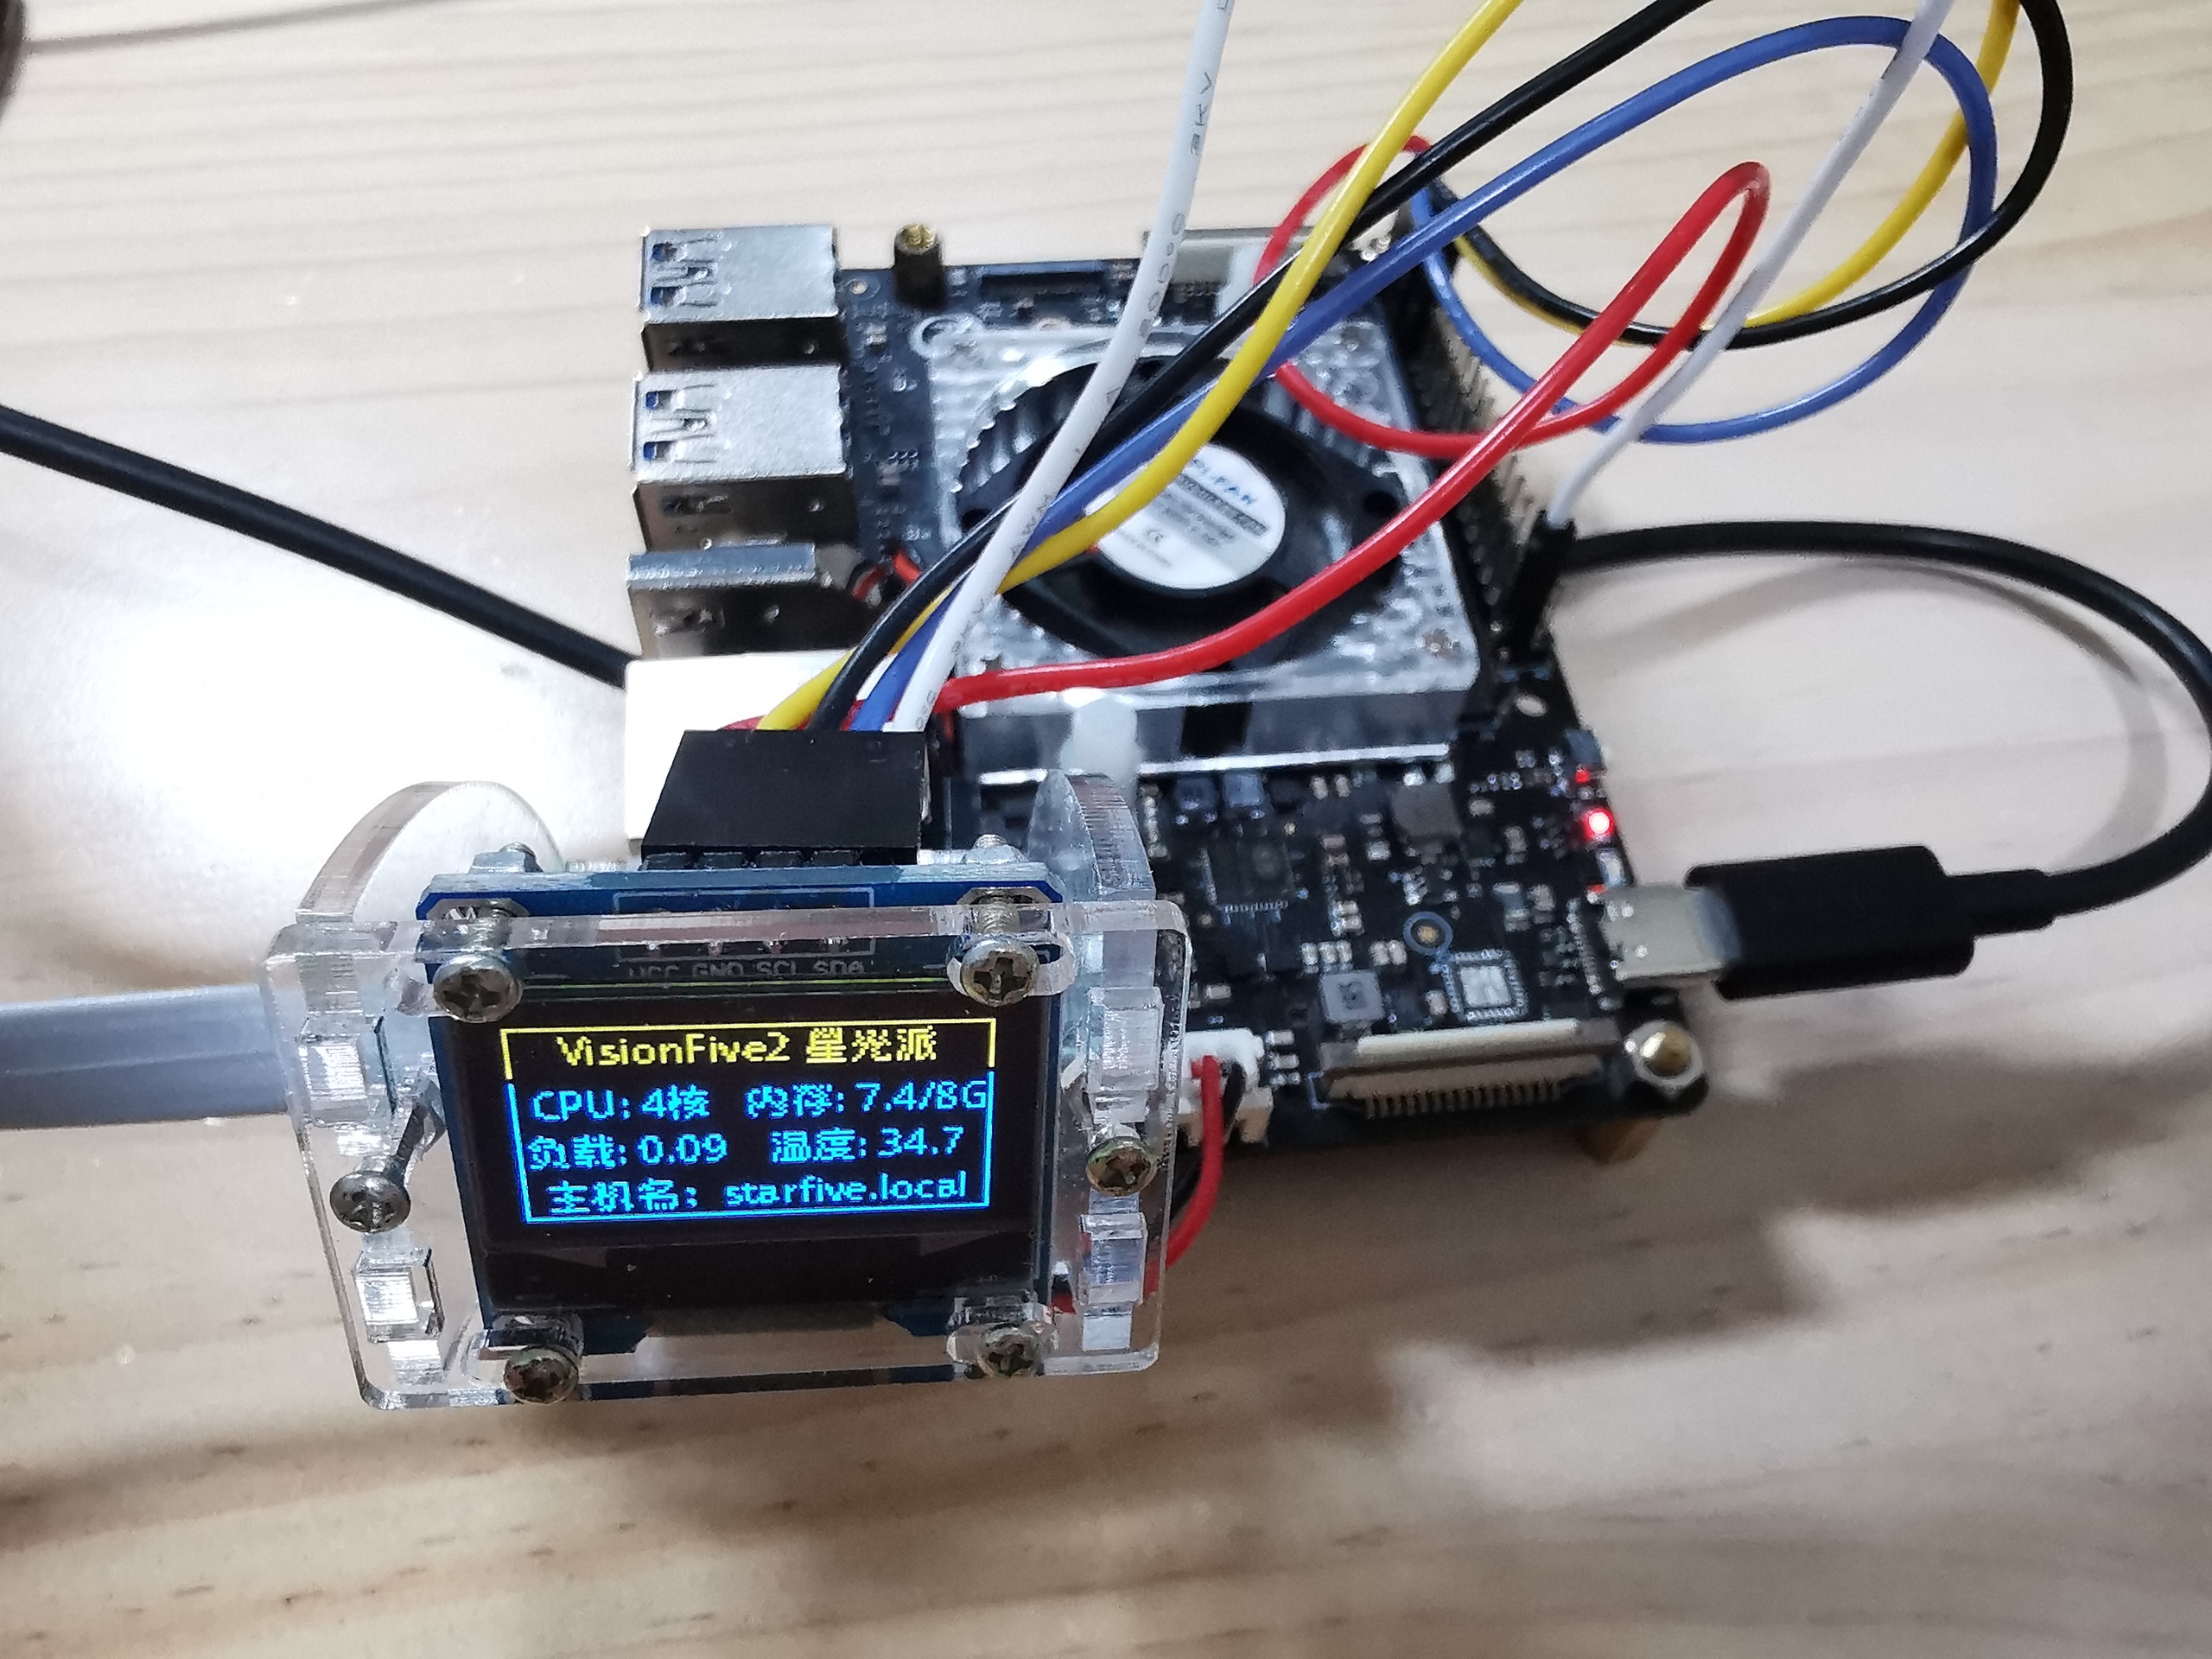
这样一个小小的OLED面板,非常的实用。
下面,就将制作使用的步骤详细说明。
一、准备一个I2C接口的OLED
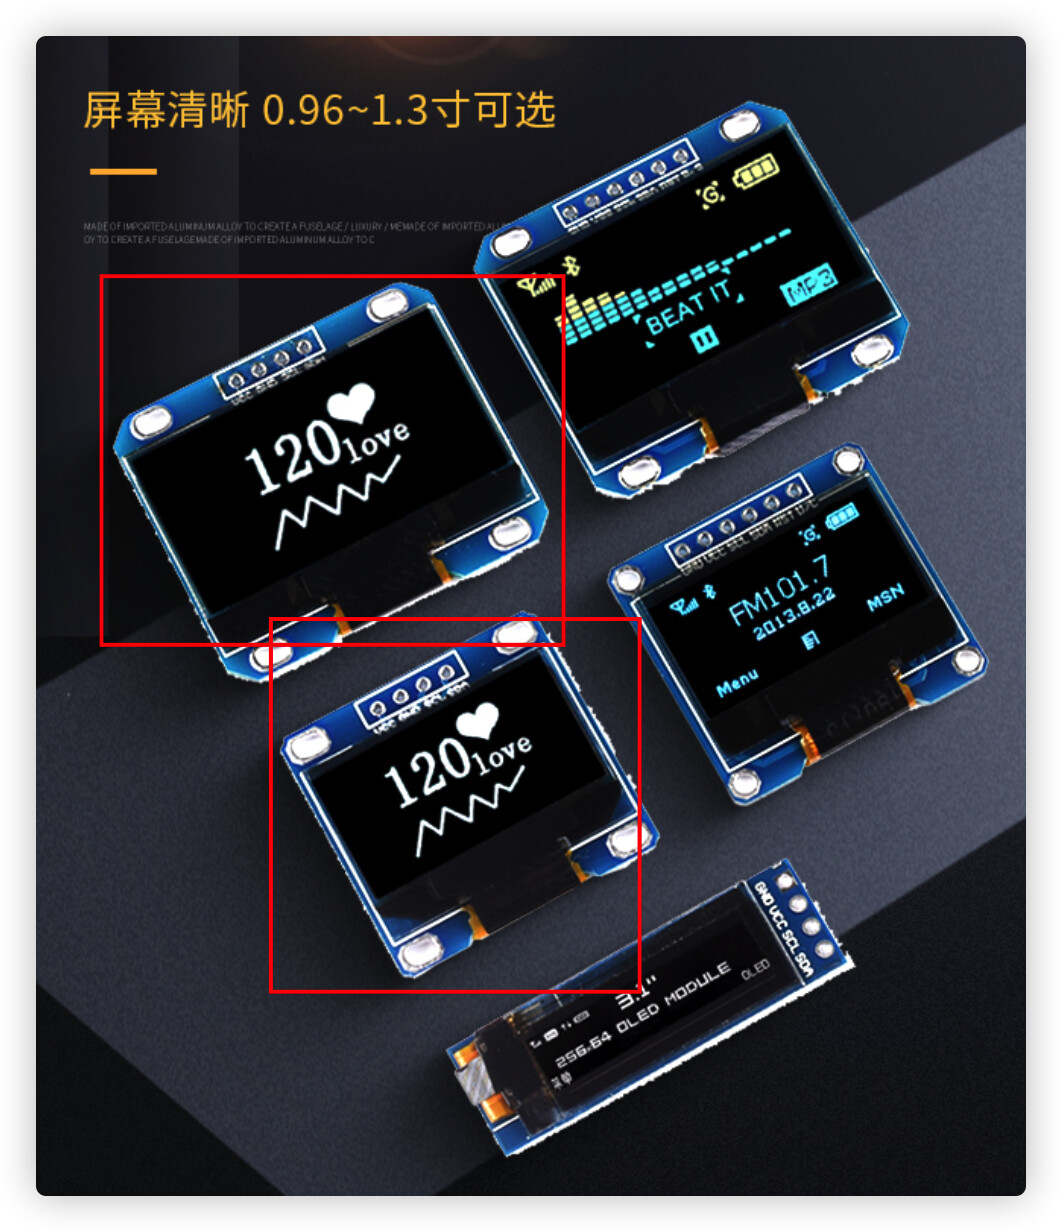
我用的是在“欣微电子”买的“12864屏0.96寸OLED显示屏模块0.91 1.3寸1.54寸液晶屏6/7针IIC/SP”。
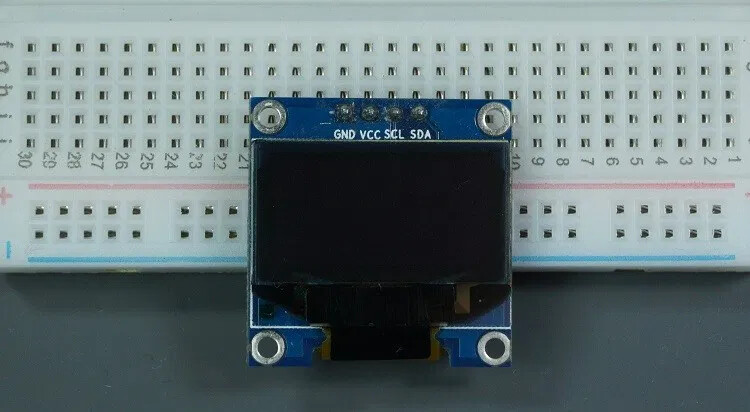
网址如下: [12864屏0.96寸OLED显示屏模块0.91 1.3寸1.54寸液晶屏6/7针IIC/SP](https://item.taobao.com/item.htm?id=570914769178)
注意,如果选用I2C接口的,选择4管脚的为好:
当然,如果你对OLED控制很熟,那么SPI接口的也是可以的,40Pin上也有SPI引脚。
二、将OLED连接到星光派
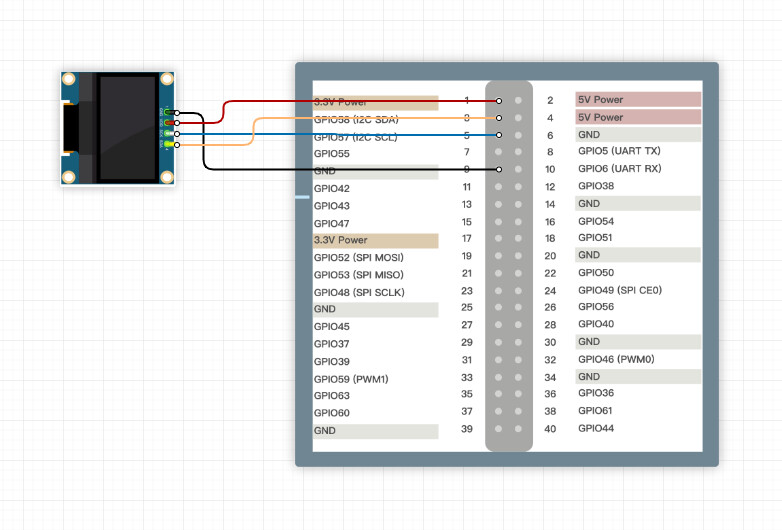
注意连接的时候,V+和GND不要连接错了,SDA和SCL要一一对应。
三、启用rc.local服务
首先,需要启用rc.local功能,使得能够开机就自动启动OLED面板程序。
如果安装的Debian系统,可以参考: Debian 11 Bullseye 解决 /etc/rc.local 开机启动问题
基本步骤如下:【以下需要使用root权限操作】
- 先编写基础的/etc/rc.local
cat <<EOF >/etc/rc.local
#!/bin/sh -e
#
# rc.local
#
# This script is executed at the end of each multiuser runlevel.
# Make sure that the script will "exit 0" on success or any other
# value on error.
#
# In order to enable or disable this script just change the execution
# bits.
#
# By default this script does nothing.

exit 0
EOF
- 设置开机启动脚本并启动对应的服务:【以下需要使用root权限操作】
chmod +x /etc/rc.local
systemctl enable --now rc-local
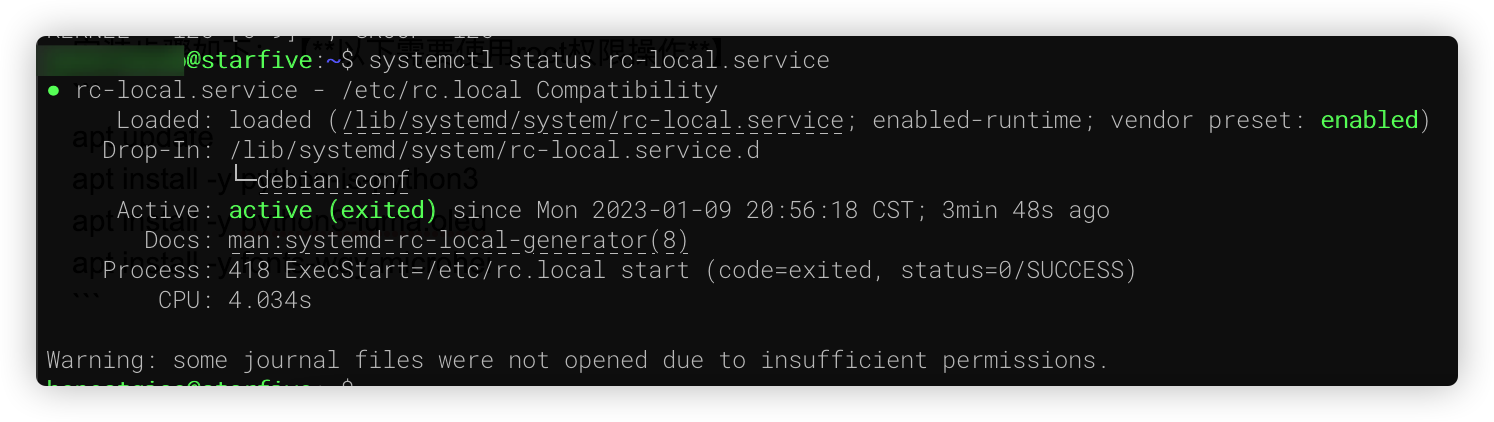
systemctl status rc-local.service
最后一步执行后,显示如下表示设置成功:
四、安装python扩展库luma.oled和字体
要在linux上的Python中编程控制SSD1306 OLED,可以使用python3-luma.oled库。
为了更好的显示效果,使用了文泉驿微米黑。
安装步骤如下:【以下需要使用root权限操作】
apt update
apt install -y python-is-python3
apt install -y python3-luma.oled
apt install -y fonts-wqy-microhei
apt install i2c-tools
五、设置普通用户i2c操作权限
默认情况下,只有root用户可以操作i2c设备。可以通过设置udev配置,来使得普通用户也有权使用。
设置步骤如下:【以下需要使用root权限操作】
cat <<EOF >/etc/udev/rules.d/99-i2c.rules
KERNEL=="i2c-[0-9]*", GROUP="i2c"
EOF
设置完成后,需要重启生效:【以下需要使用root权限操作】
reboot
六、检查OLED是否连接成功
使用i2c-tools中的命令即可:【以下无需使用root权限操作】
i2cdetect -y -r 0
执行后输出结果如下,表示成功:
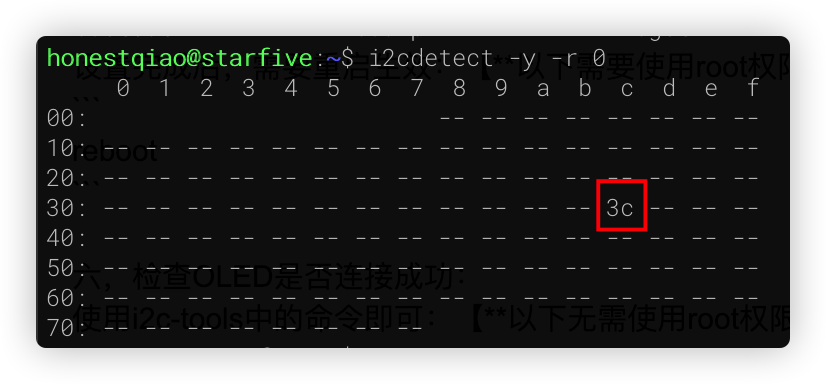
如果没有输出上述的3c信息,请检查连线是否正确。
七、编写python程序
将控制OLED输出系统信息的脚本,写入到 /usr/local/sbin/oled_dashboard.py。
下面的命令可以直接写入:【以下需要使用root权限操作】
cat <<EOF >/usr/local/sbin/oled_dashboard.py
#!/usr/bin/python
# -*- coding: UTF-8 -*-

import time
import os
import math
import subprocess
from luma.core.interface.serial import i2c
from luma.oled.device import ssd1306
from luma.core.render import canvas
from PIL import Image,ImageDraw,ImageFont

# 既可以判断执行是否成功,还可以获取执行结果
def subprocess_popen(statement):
    p = subprocess.Popen(statement, shell=True, stdout=subprocess.PIPE)  # 执行shell语句并定义输出格式
    while p.poll() is None:  # 判断进程是否结束(Popen.poll()用于检查子进程(命令)是否已经执行结束,没结束返回None,结束后返回状态码)
        if not p.wait() == 0:  # 判断是否执行成功(Popen.wait()等待子进程结束,并返回状态码;如果设置并且在timeout指定的秒数之后进程还没有结束,将会抛出一个TimeoutExpired异常。)
            print("命令执行失败,请检查设备连接状态")
            return False
        else:
            re = p.stdout.readlines()  # 获取原始执行结果
            result = []
            for i in range(len(re)):  # 由于原始结果需要转换编码,所以循环转为utf8编码并且去除\n换行
                res = re[i].decode('utf-8').strip('\r\n')
                result.append(res)
            return result

# 开启OLED
device = ssd1306(i2c(port=0, address=0x3c), width=128, height=64, rotate=0)

# 设置最小对比度
device.contrast(1)

# 显示OLED信息.
print(f'device size {device.size}')
print(f'device mode {device.mode}')

# NB this will only send the data to the display after this "with" block is complete.
# NB the draw variable is-a PIL.ImageDraw.Draw (https://pillow.readthedocs.io/en/3.1.x/reference/ImageDraw.html).
# see https://github.com/rm-hull/luma.core/blob/master/luma/core/render.py
time1 = time.time()
while True:
    # CPU温度
    # ret1 = subprocess_popen("/usr/bin/sensors")
    ret1 = subprocess_popen("cat /sys/class/hwmon/hwmon0/temp1_input")

    # CPU核数
    # ret2 = subprocess_popen("lscpu | grep 'CPU(s):'")
    ret2 = subprocess_popen("cat /proc/cpuinfo  | grep -c processor")

    # IP地址
    ret3 = subprocess_popen("ip addr show | grep inet | grep -v 127.0.0.1 | head -1")

    # 总内存
    ret4 = subprocess_popen("cat /proc/meminfo | grep MemTotal")

    # 系统负载
    ret5 = subprocess_popen("w | head -1")

    # hostname
    ret6 = subprocess_popen("hostnamectl | grep hostname")

    # 剩余内存
    ret7 = subprocess_popen("cat /proc/meminfo | grep MemFree")

    if not ret1 == False and not ret2 == False and not ret3 == False and not ret4 == False and not ret5 == False and not ret6 == False:
        with canvas(device, dither=True) as draw:
            draw.rectangle(device.bounding_box, outline='white', fill='black')

            ft = ImageFont.truetype('/usr/share/fonts/truetype/wqy/wqy-microhei.ttc', 12)

            message = 'VisionFive2 星光派'
            text_size = draw.textsize(message,font = ft)
            print(message)
            draw.text(((device.width - text_size[0])//2, 0), message, font = ft, fill='white')

            # message = 'CPU: %s核' % ret2[0].replace(' ','').split(':')[1]
            message = 'CPU: %s核' % ret2[0]
            text_size = draw.textsize(message,font = ft)
            print(message)
            draw.text(((device.width - text_size[0])//2-35, 16), message, font = ft, fill='white')

            mem_total = math.ceil(int(ret4[0].replace(' ','').replace('kB',':kB').split(':')[1])/1024/1024)
            mem_free = int(ret7[0].replace(' ','').replace('kB',':kB').split(':')[1])/1024/1024
            message = '内存: %0.1f/%dG' % (mem_free, mem_total)
            text_size = draw.textsize(message,font = ft)
            print(message)
            draw.text(((device.width - text_size[0])//2+30, 16), message, font = ft, fill='white')

            message = '负载: %s' % ret5[0].split(',')[4].replace(' ','')
            text_size = draw.textsize(message,font = ft)
            print(message)
            draw.text(((device.width - text_size[0])//2-35, 32), message, font = ft, fill='white')

            # message = '温度: %s' % ret1[2].replace(' ','').replace('+','').split(':')[1]
            message = '温度: %0.1f' % (int(ret1[0])/1000)
            text_size = draw.textsize(message,font = ft)
            print(message)
            draw.text(((device.width - text_size[0])//2+30, 32), message, font = ft, fill='white')

            if time.time() - time1 > 5:
                if len(ret3[0]) == 0:
                    message='IP地址:正在获取...'
                else:
                    message='IP地址:%s' % ret3[0].replace(' ','').replace('inet','inet:').replace('/',':').split(':')[1]
                time1 = time.time()
            else:
                message='主机名:%s.local' % ret6[0].replace(' ','').split(':')[1]

            text_size = draw.textsize(message,font = ft)
            print(message)
            draw.text(((device.width - text_size[0])//2, 48), message, font = ft, fill='white')
    time.sleep(3)
EOF
然后,设置改脚本的执行权限:【以下需要使用root权限操作】
chmod +x /usr/local/sbin/oled_dashboard.py
八、运行python程序查看效果
运行 /usr/local/sbin/oled_dashboard.py,即可输出结果:【以下无需使用root权限操作】
/usr/bin/python /usr/local/sbin/oled_dashboard.py
执行后,命令行显示如下:
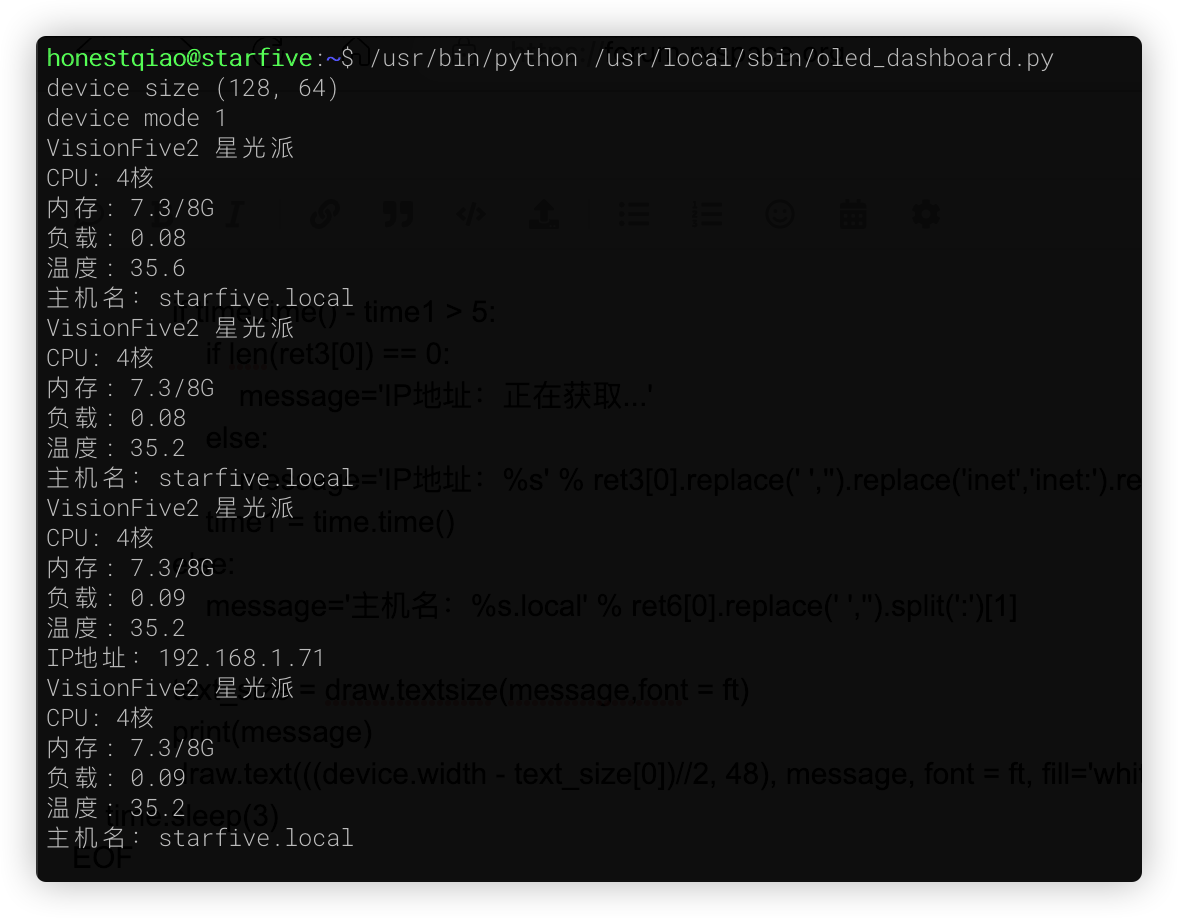
OLED面板上也会显示信息:

九、设置开机启动python程序显示到OLED面板:
在/etc/rc.local中,添加启动/usr/local/sbin/oled_dashboard.py的命令:【以下需要使用root权限操作】
cat <<EOF >/etc/rc.local
#!/bin/sh -e
/usr/bin/python /usr/local/sbin/oled_dashboard.py > /tmp/oled_dashboard.olg &
exit 0
EOF
注意:如果你修改过/etc/rc.loca,添加了自己的命令,那么请编辑/etc/rc.local来添加上面启动oled_dashboard.py的一行,放在exit 0之前;否则使用上面的命令,会覆盖/etc/rc.local现有的所有内容。
十、开机重启检测是否生效
重启一下,检查开机后,是否能够正确启动OLED面板显示:【以下需要使用root权限操作】
reboot
十一、后记
上面的oled_dashboard.py脚本,演示了显示一些系统信息,你完全可以根据自己的需要,显示自己想要的信息。
另外,本分享使用的是I2C接口的OLED,你也完全可以参考使用SPI的OLED。
最后,星光派非常不错,细心钻研一下,会有很多好玩的玩法的。